Tandy 1000TX and SX Pictures
Following are some pictures of the 1000TX (below are some of
the 1000SX). With an 8MHz 286 processor
and memory upgradeable to 768k, the TX is the last of the PCjr-compatible
1000's.
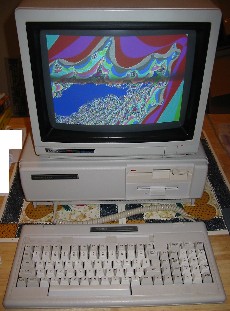  At
left is a view of the TX displaying a fractal image using
Fractint. At
left is a view of the TX displaying a fractal image using
Fractint.
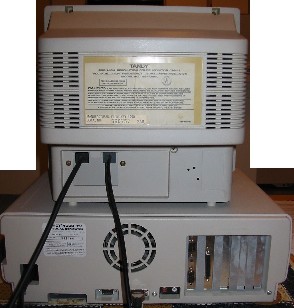
At right, a view from the back.
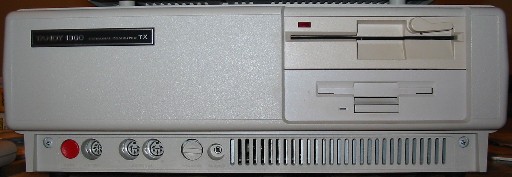 At right,
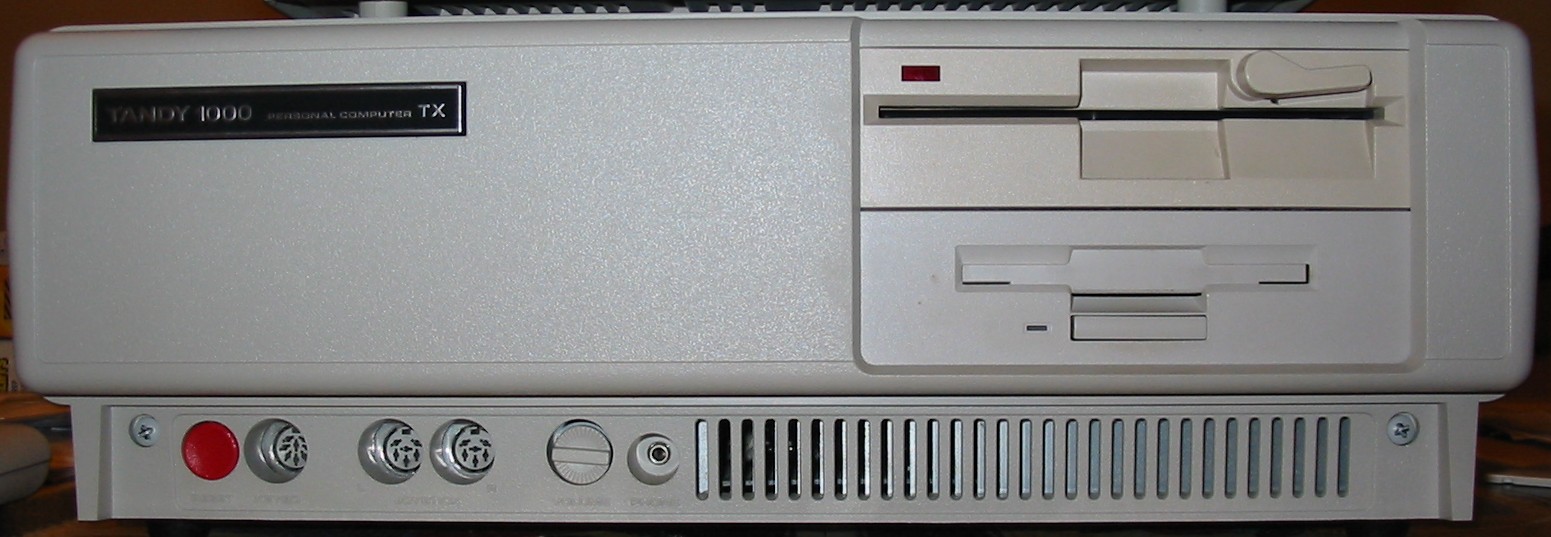
the front panel. The 3-1/2" drive is standard, the 5-1/4" drive was added by the
previous owner. On the front: a reset button, keyboard port, 6-pin joystick
ports, volume control knob, and earphone port. At right,
the front panel. The 3-1/2" drive is standard, the 5-1/4" drive was added by the
previous owner. On the front: a reset button, keyboard port, 6-pin joystick
ports, volume control knob, and earphone port.
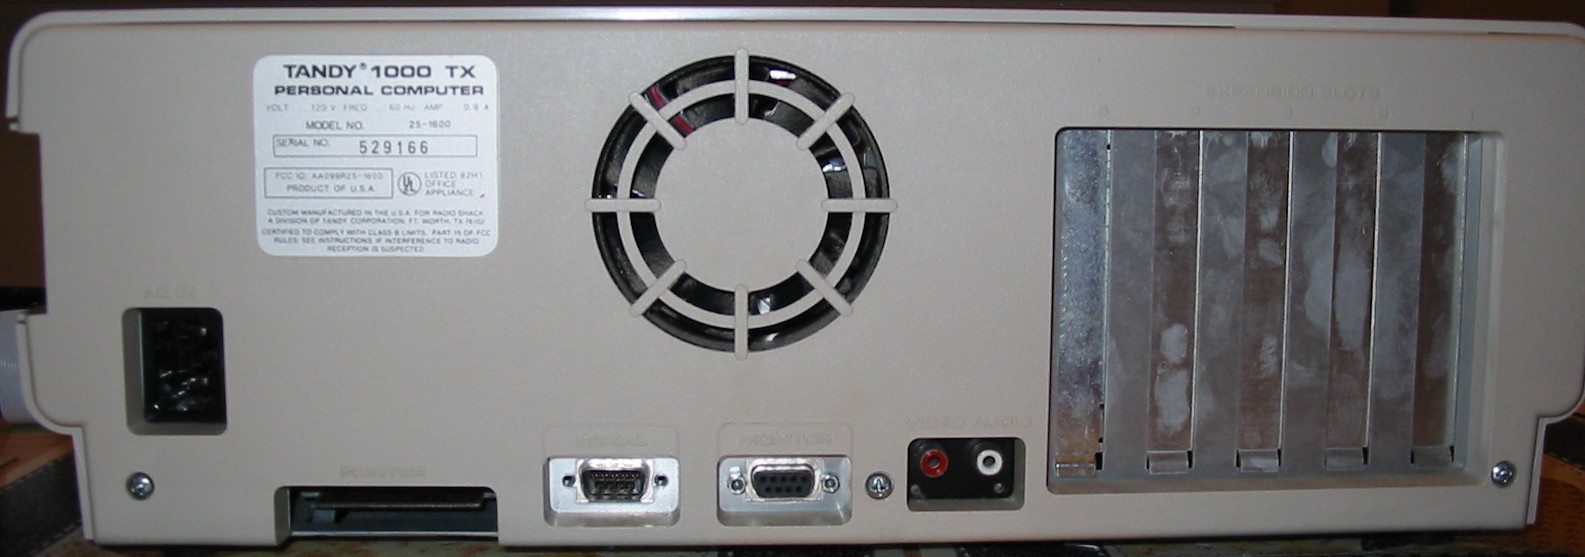
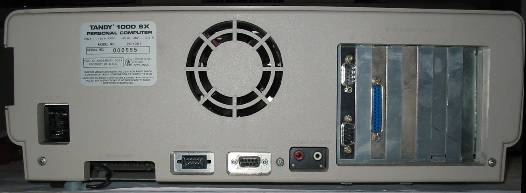
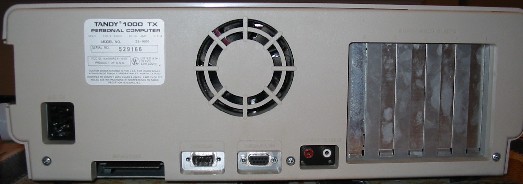 And the back
panel. The power plug, Tandy-style card-edge parallel port, serial port, CGA
digital video port, composite CGA video port (red) and audio port (white). The
composite video and audio ports are compatible with the RCA ports on a modern TV
or VCR. And the back
panel. The power plug, Tandy-style card-edge parallel port, serial port, CGA
digital video port, composite CGA video port (red) and audio port (white). The
composite video and audio ports are compatible with the RCA ports on a modern TV
or VCR.
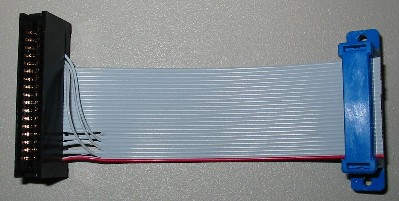 
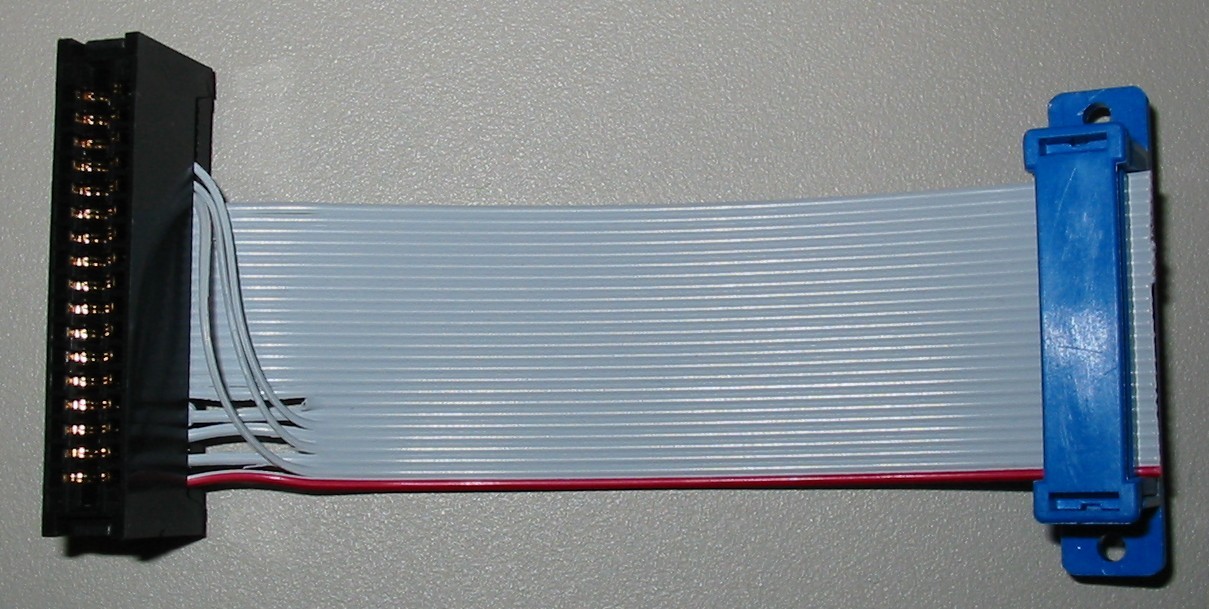
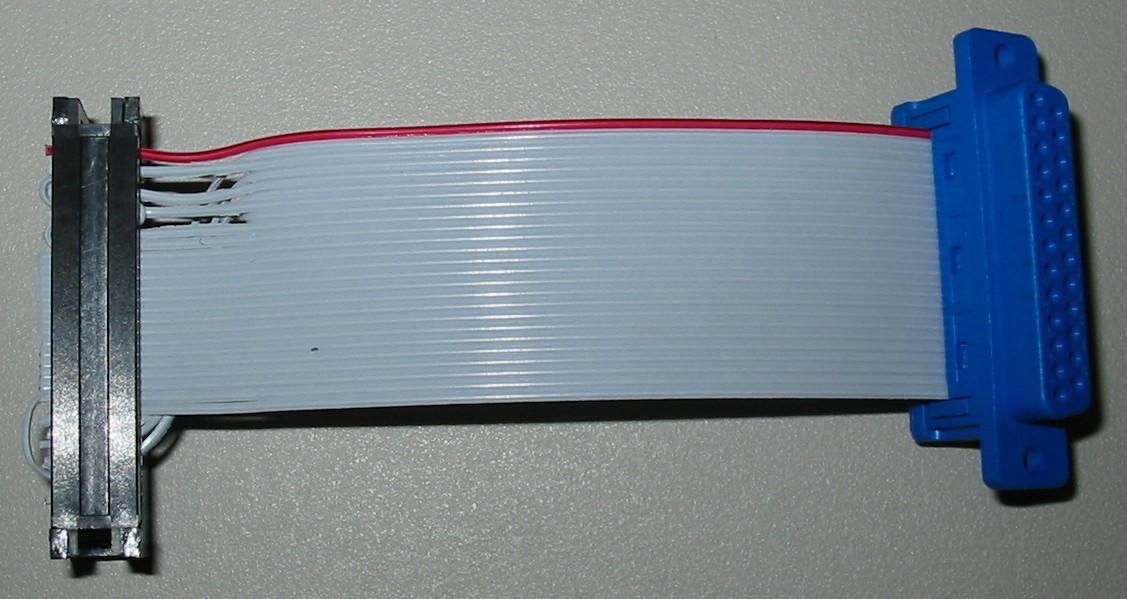
Above left and right, an adapter to convert the 34-pin card edge
printer port to a standard 25-pin port. Jim Sandlin gives detailed instructions
on how to make this adapter on
his Web site.
Unfortunately, while this adapter works with printers, it
didn't work
with a Zip drive. Apparently, the TX's parallel port can't be used
bidirectionally, not even in "nibble mode." (As an alternative to making an
adapter like this, Tandy made
different cables - if
you can find them - to
connect Tandy and non-Tandy printers to the card-edge port.)
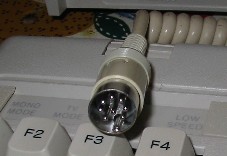 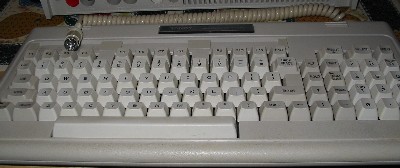 At
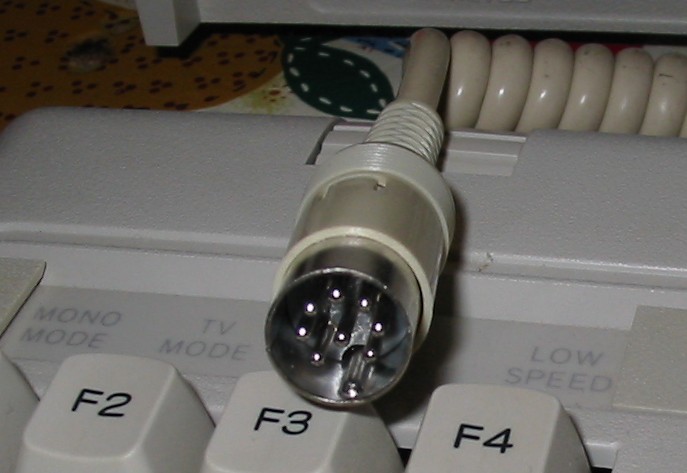
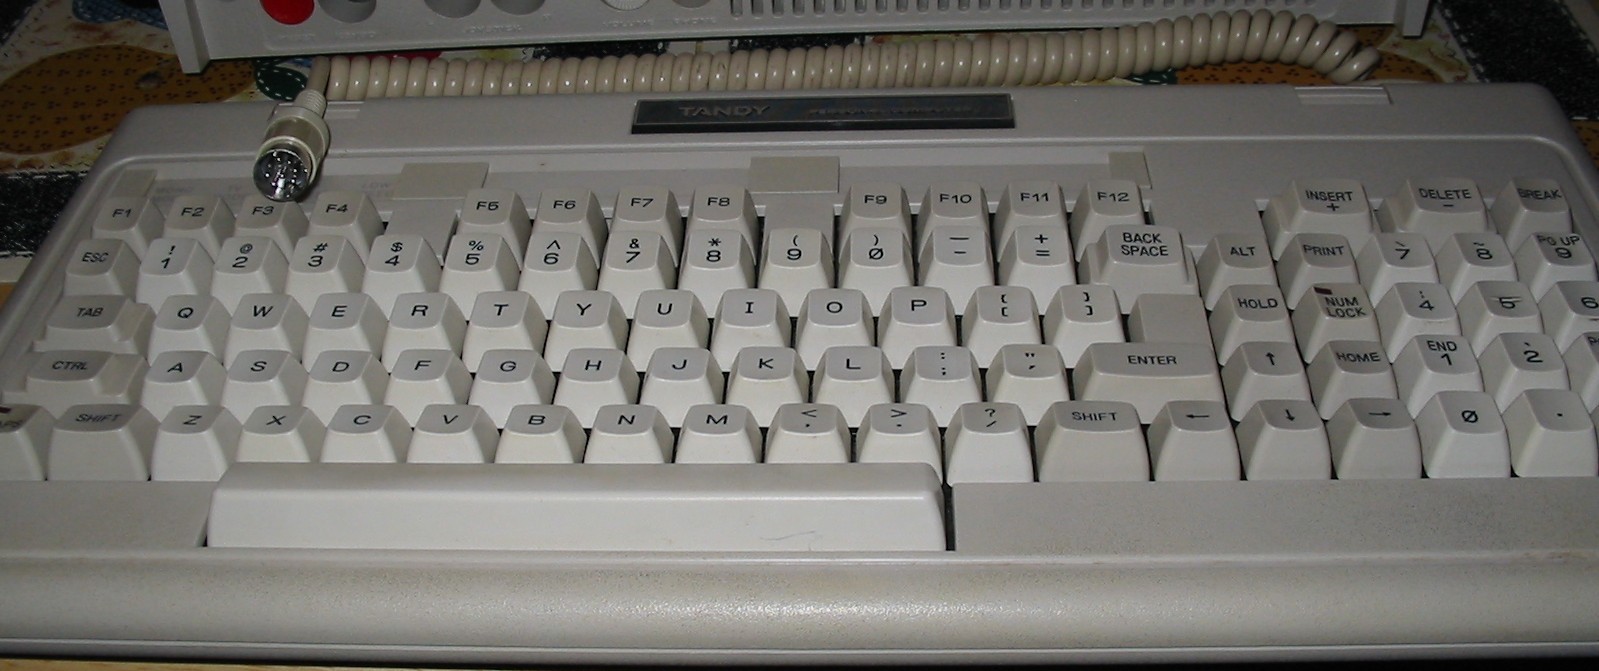
left, a view of the keyboard. Tandy designed its own keyboard for the
1000 rather than using a standard type. This keyboard uses an 8-pin DIN plug
like the one at right; you can also see labels for function keys that
can be pressed to select options at bootup. Note at left how the "lock up
system" (i.e., At
left, a view of the keyboard. Tandy designed its own keyboard for the
1000 rather than using a standard type. This keyboard uses an 8-pin DIN plug
like the one at right; you can also see labels for function keys that
can be pressed to select options at bootup. Note at left how the "lock up
system" (i.e., HOLD) key is conveniently located right next to
ENTER.
 Left:
No User Serviceable Parts Inside! Left:
No User Serviceable Parts Inside!
 At
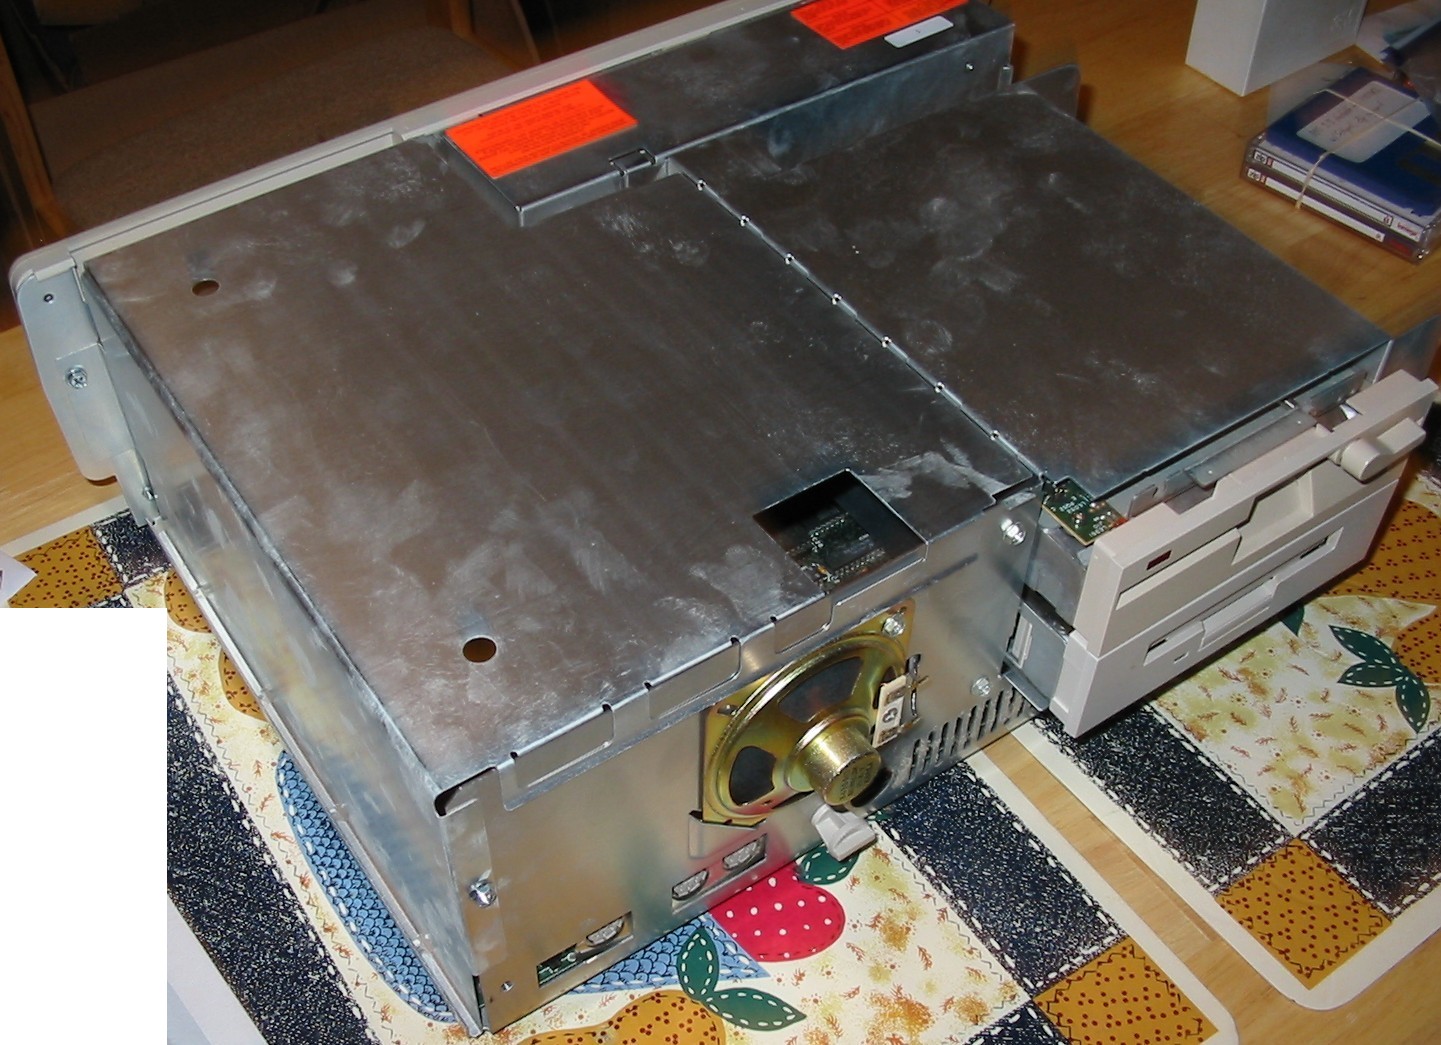
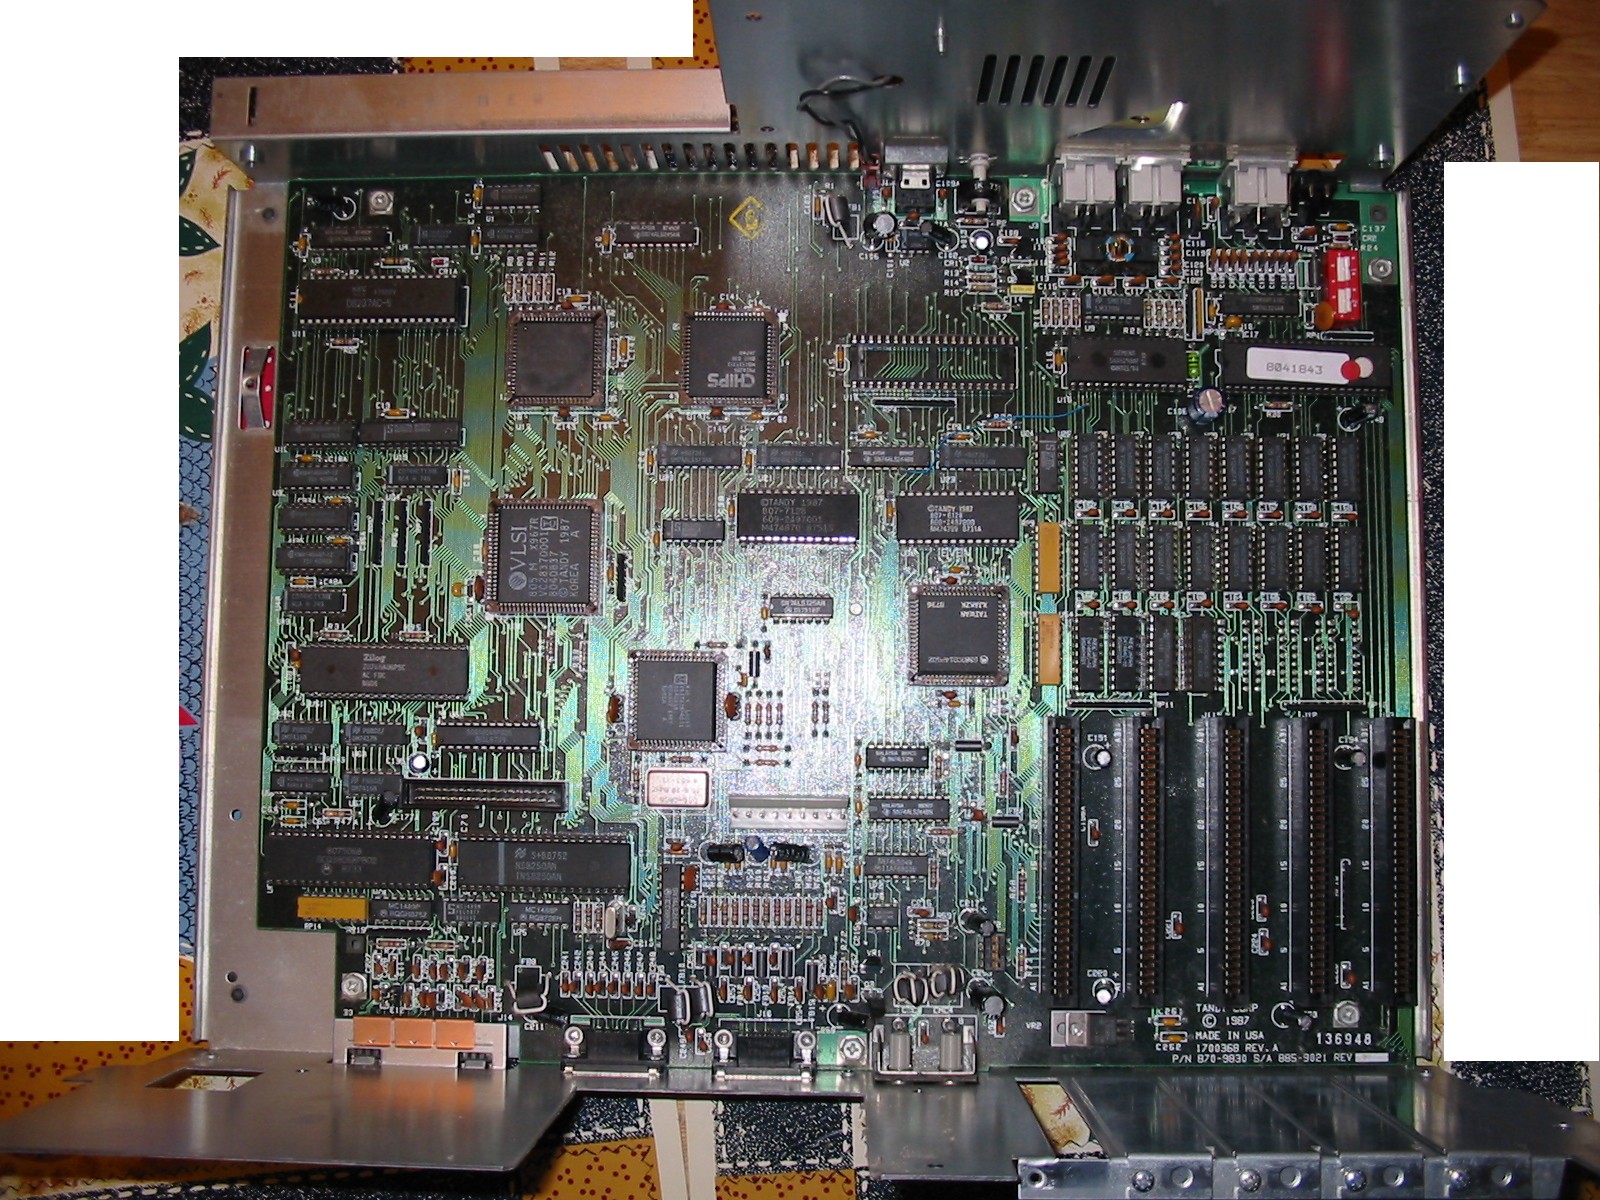
right, a view with the cowl removed. At
right, a view with the cowl removed.
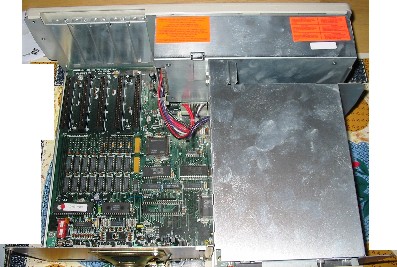
 The drive
bays come out as a unit, left. The drive
bays come out as a unit, left.
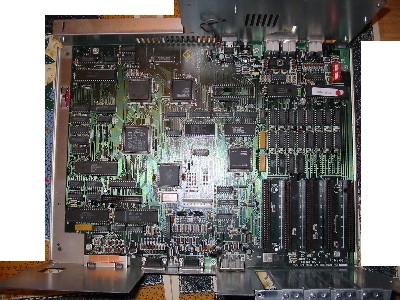
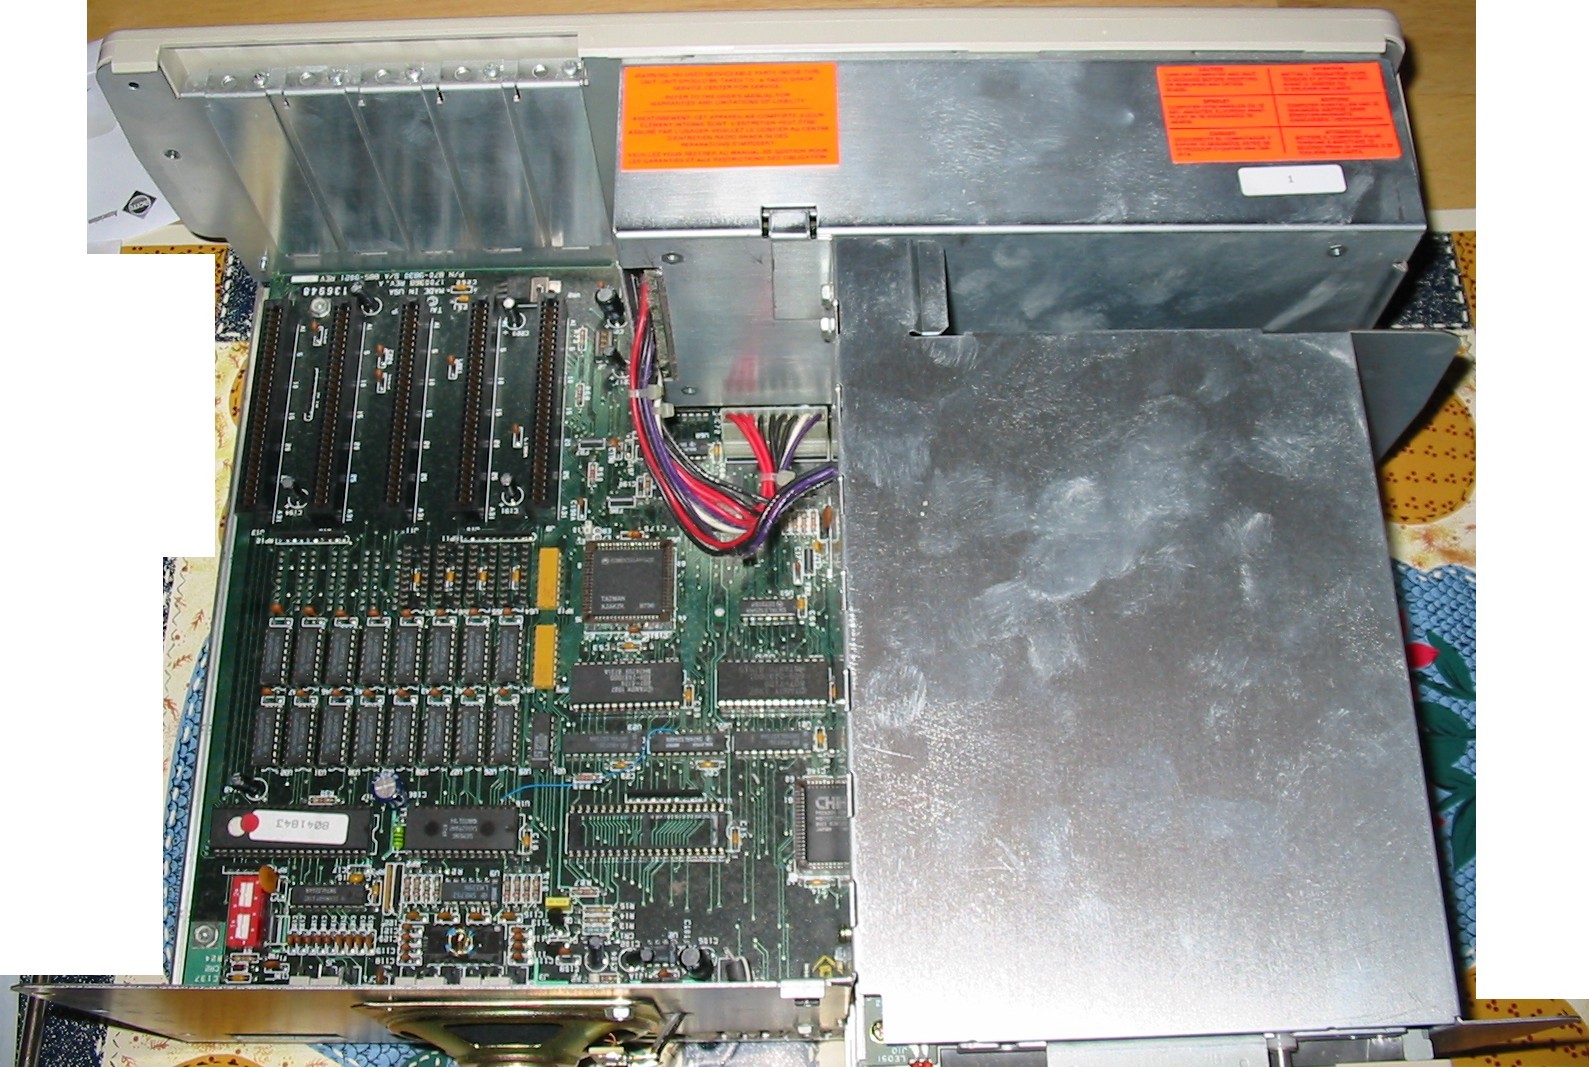
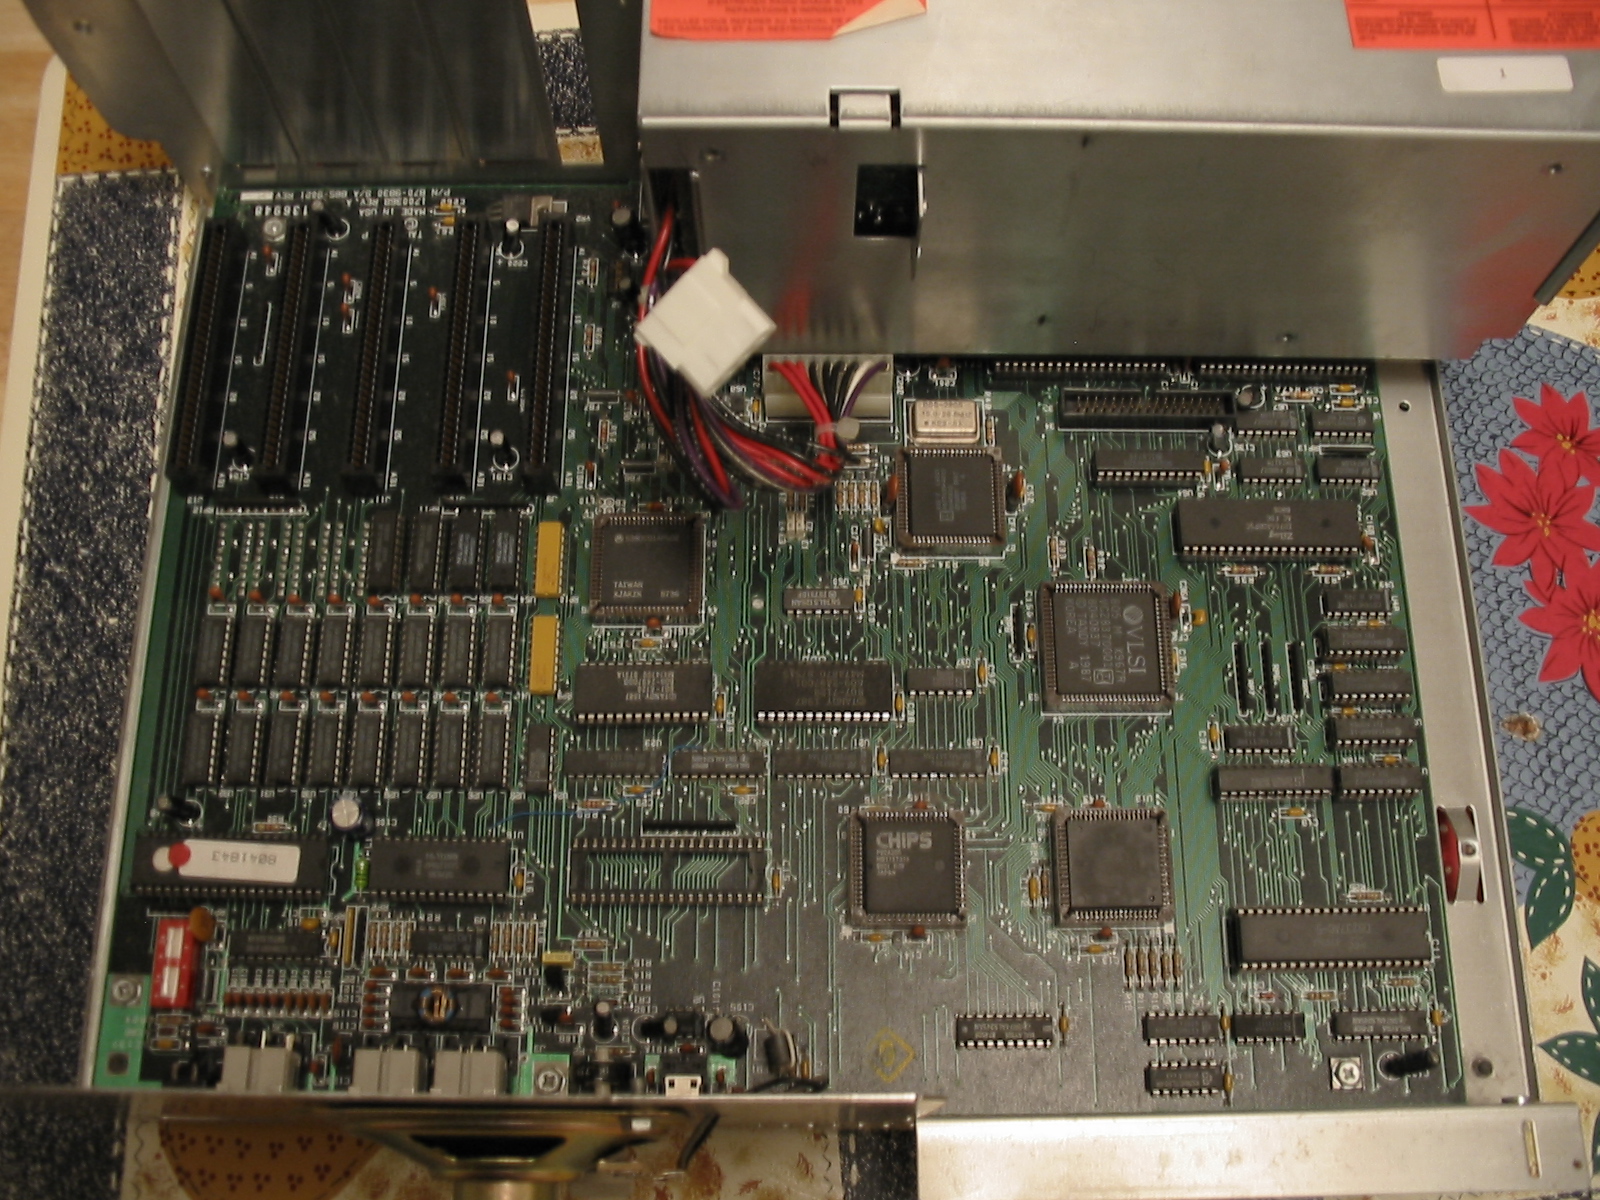
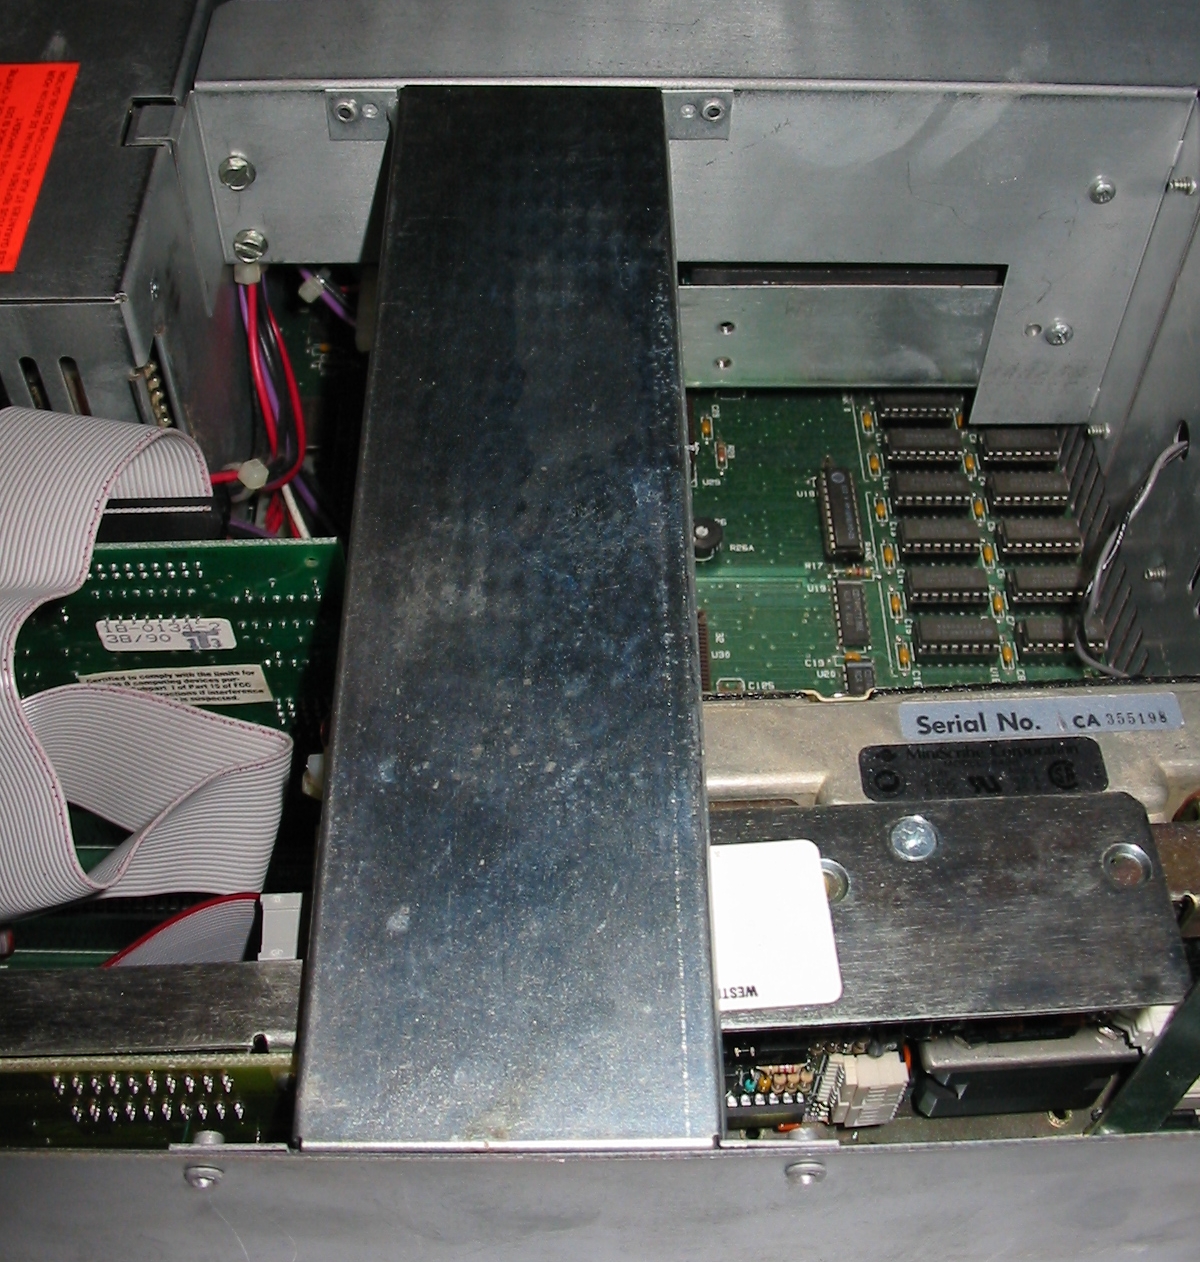
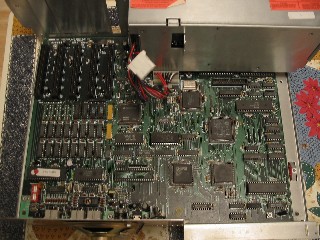
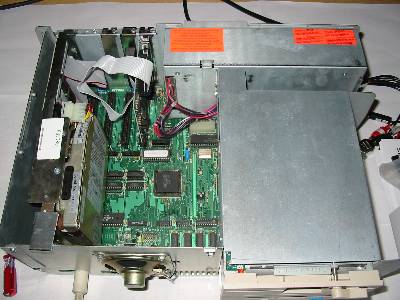
At right, a view from the back with the power supply removed. The 286
is the square chip at top left in the picture.
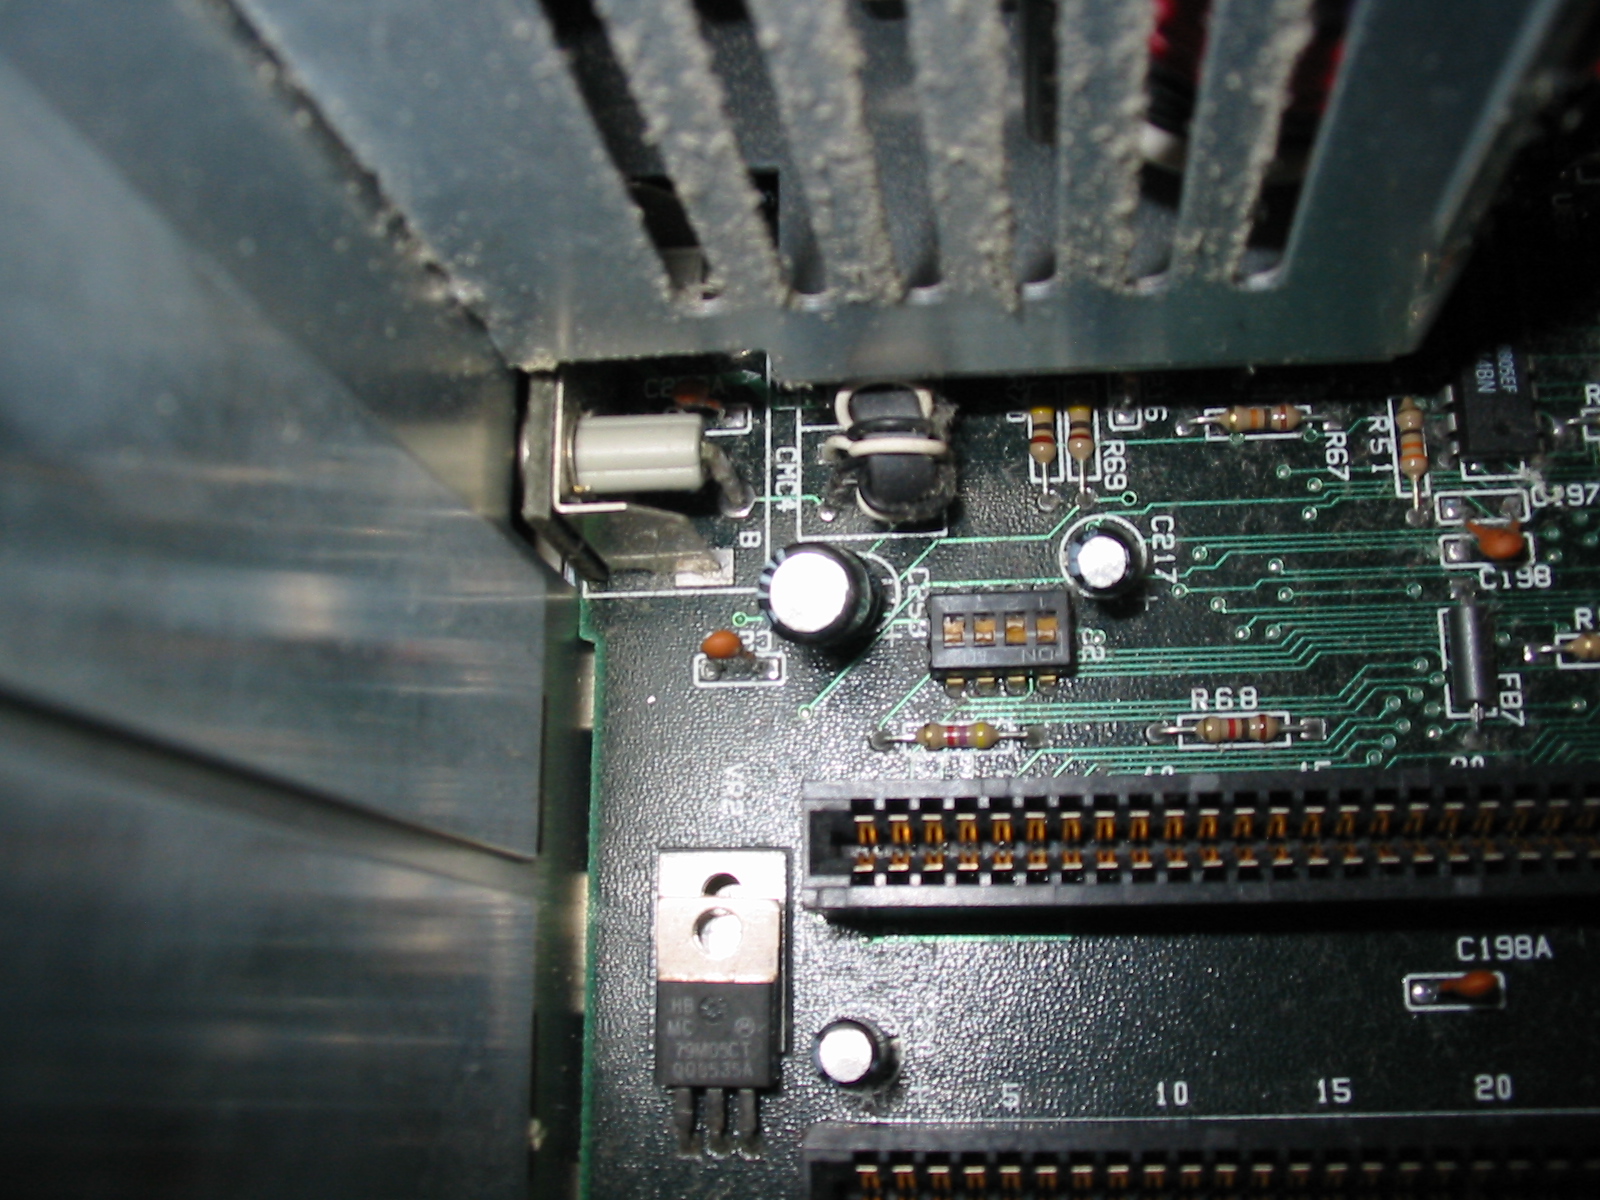
  Left: there is a bank of DIP switches next to the expansion slots. DIP
switch 2 needs to be turned off to use a standard XT hard drive controller, or
an upgrade video card. Left: there is a bank of DIP switches next to the expansion slots. DIP
switch 2 needs to be turned off to use a standard XT hard drive controller, or
an upgrade video card.
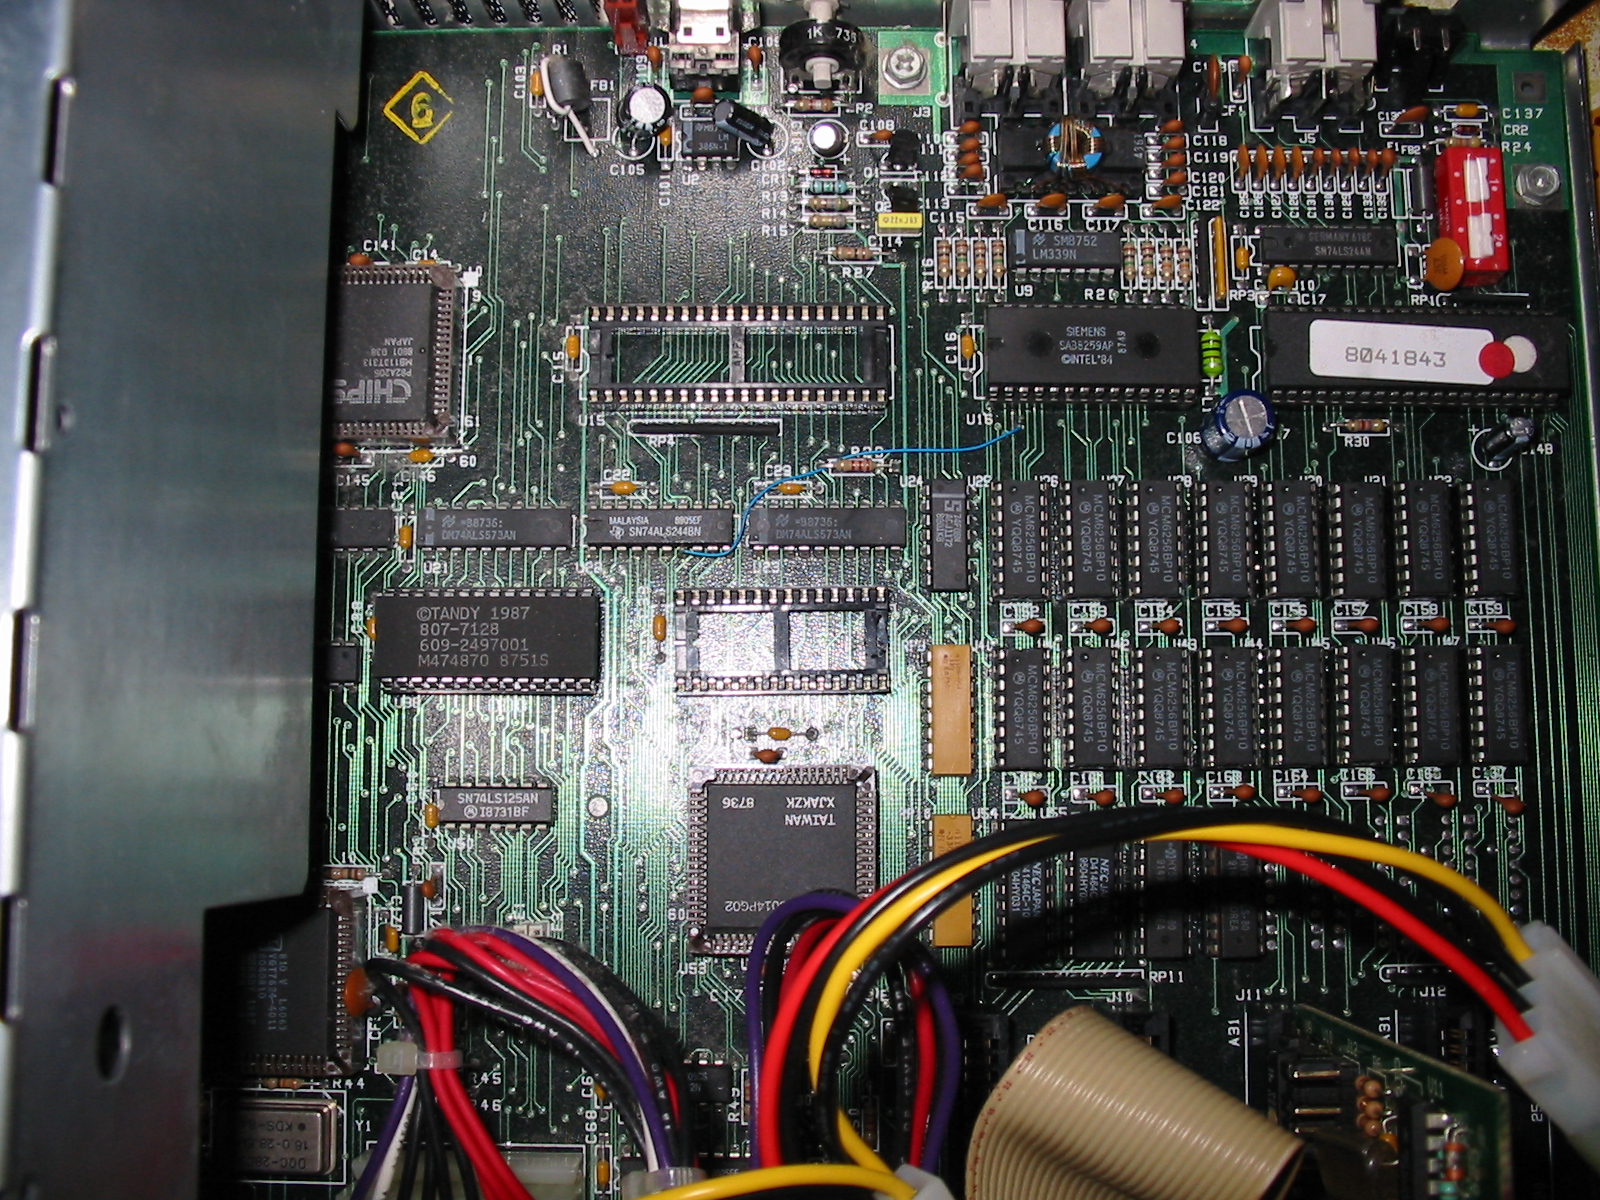
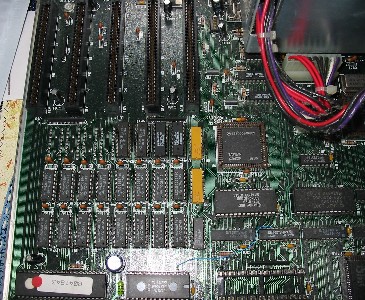
At right, the memory chips are installed. To the right and above is a
jumper that needs to be removed to get the memory recognized.
  The
TX didn't come with a real-time clock. To get one, you install a Dallas
Semiconductor DS1216E, called a Smartwatch. These pictures (left,
right, below) show it being installed under a ROM chip. The
TX didn't come with a real-time clock. To get one, you install a Dallas
Semiconductor DS1216E, called a Smartwatch. These pictures (left,
right, below) show it being installed under a ROM chip.
 Right:
The Right:
The SMWCLOCK.COM program from Tandy is used with the Smartwatch.
 Left:
I have two cards installed, a hardcard, which as you can see is very wide, and
an I/O card that takes up two slots (it has two serial ports and a parallel
port). Now, the hardcard would normally go in the innermost slot because of its
width and power draw, but that slot is blocked by the Smartwatch, so I have
moved the hardcard to the middle slot, and I have used a power splitter cable to
connect power directly to the hard drive rather than have the drive draw power
through the expansion bus. The parallel port for the I/O card takes up very
little space and fits next to the hardcard, then the I/O card itself, which is a
very short card and also fits in limited space. That leaves two 10" slots open
at the end. I have turned DIP switch 2 off on the motherboard (see above),
though Tandy hardcards like this one can use IRQ 2. Left:
I have two cards installed, a hardcard, which as you can see is very wide, and
an I/O card that takes up two slots (it has two serial ports and a parallel
port). Now, the hardcard would normally go in the innermost slot because of its
width and power draw, but that slot is blocked by the Smartwatch, so I have
moved the hardcard to the middle slot, and I have used a power splitter cable to
connect power directly to the hard drive rather than have the drive draw power
through the expansion bus. The parallel port for the I/O card takes up very
little space and fits next to the hardcard, then the I/O card itself, which is a
very short card and also fits in limited space. That leaves two 10" slots open
at the end. I have turned DIP switch 2 off on the motherboard (see above),
though Tandy hardcards like this one can use IRQ 2.
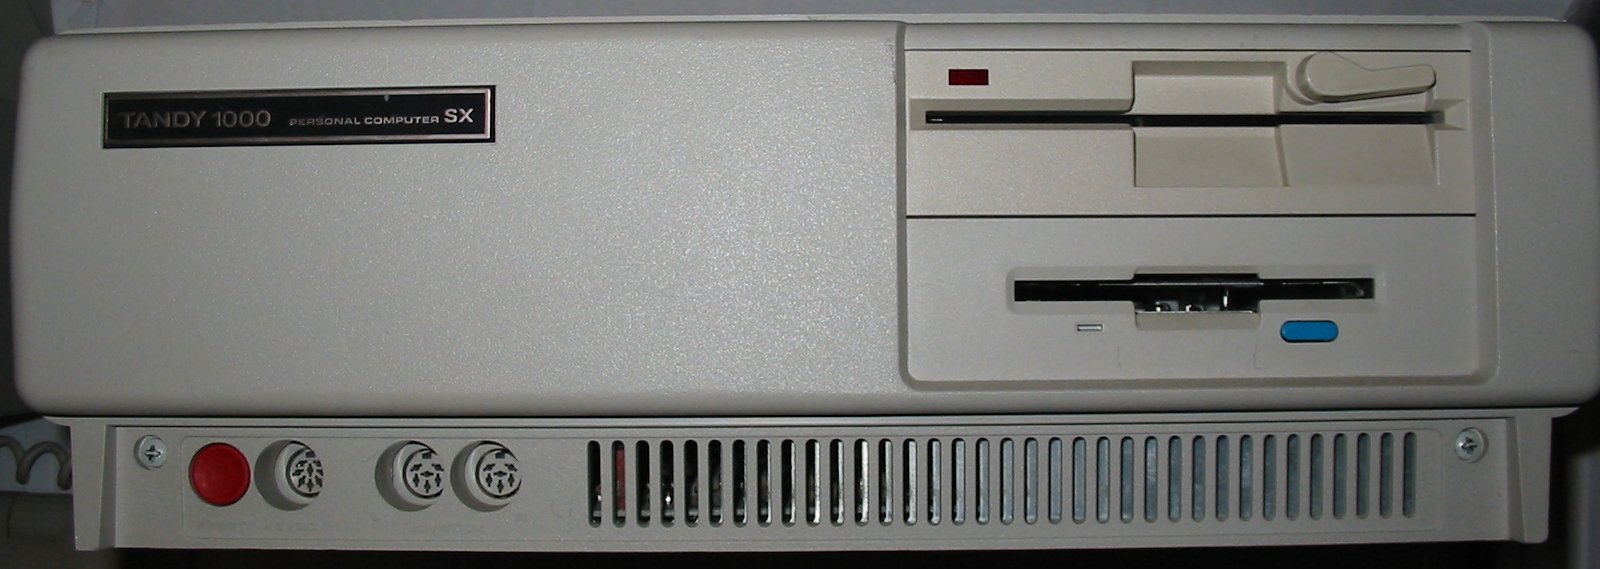
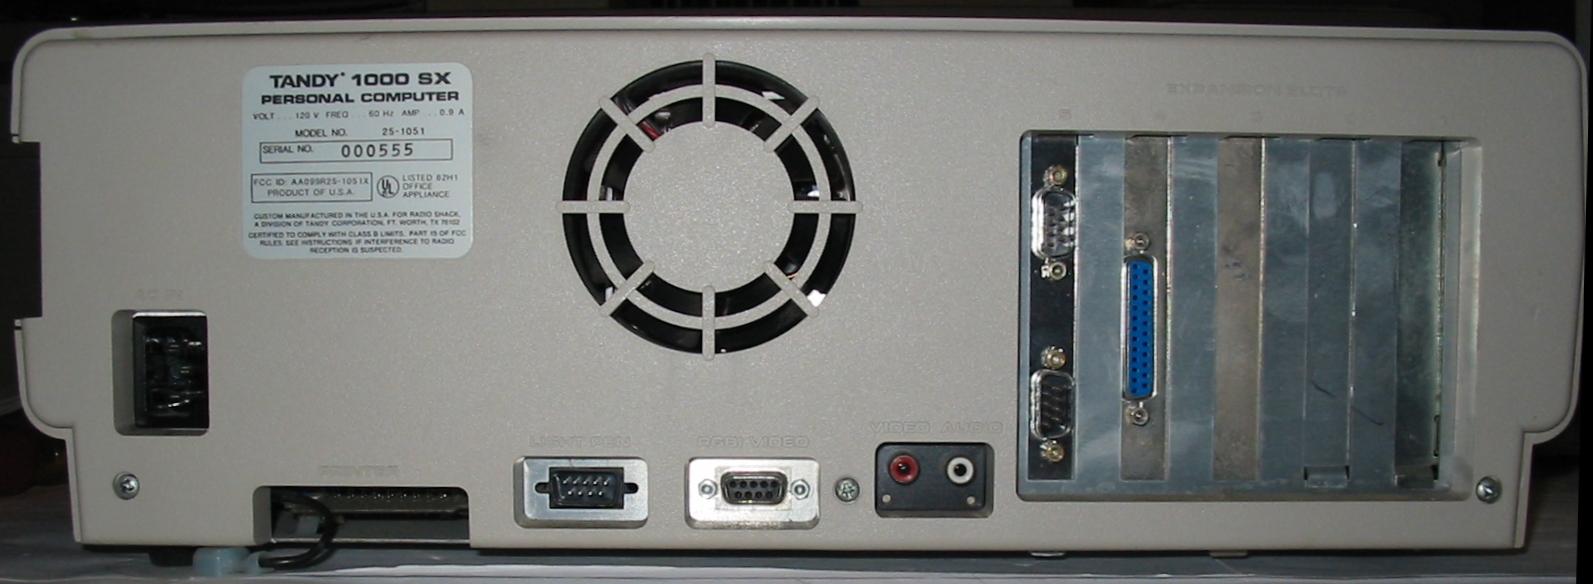
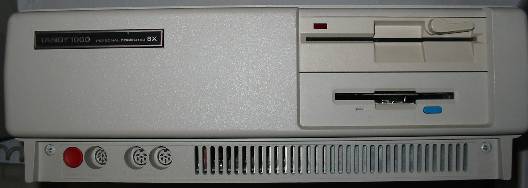 Right and
below, the front and back of the 1000SX. The SX is
the "little brother" of the TX, produced the year before (1987) and containing a
7.16MHz 8088. This machine came with 256k RAM and is upgradable to 640k on the
motherboard, the first Tandy 1000 model that didn't require an expansion card to
go that high (and also the first model to come with a DMA chip). The SX came
with a 5-1/4" floppy drive; the 3-1/2" drive pictured is an add-on. The memory
has been upgraded as well. Right and
below, the front and back of the 1000SX. The SX is
the "little brother" of the TX, produced the year before (1987) and containing a
7.16MHz 8088. This machine came with 256k RAM and is upgradable to 640k on the
motherboard, the first Tandy 1000 model that didn't require an expansion card to
go that high (and also the first model to come with a DMA chip). The SX came
with a 5-1/4" floppy drive; the 3-1/2" drive pictured is an add-on. The memory
has been upgraded as well.
 Apart from the differences listed above, the SX and TX are very similar
machines. Apart from the differences listed above, the SX and TX are very similar
machines.
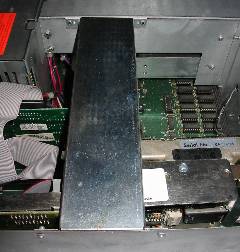
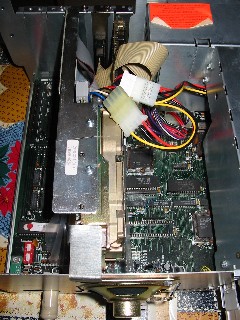
Right:
No User Serviceable Parts Inside, and we mean it this time!! When you open the
machine, you see this crossbar blocking access to the expansion slots. It looks
like it's riveted in, but it really isn't - it pulls right out. (Actually, this
bar is probably there to help support the weight of a monitor.)
Pictured below is the computer with the crossbar removed.
 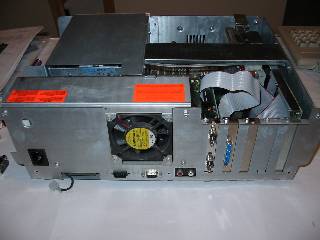 It
is easier to get at the slot screws if you remove the rear cover also; see at
right. It
is easier to get at the slot screws if you remove the rear cover also; see at
right.
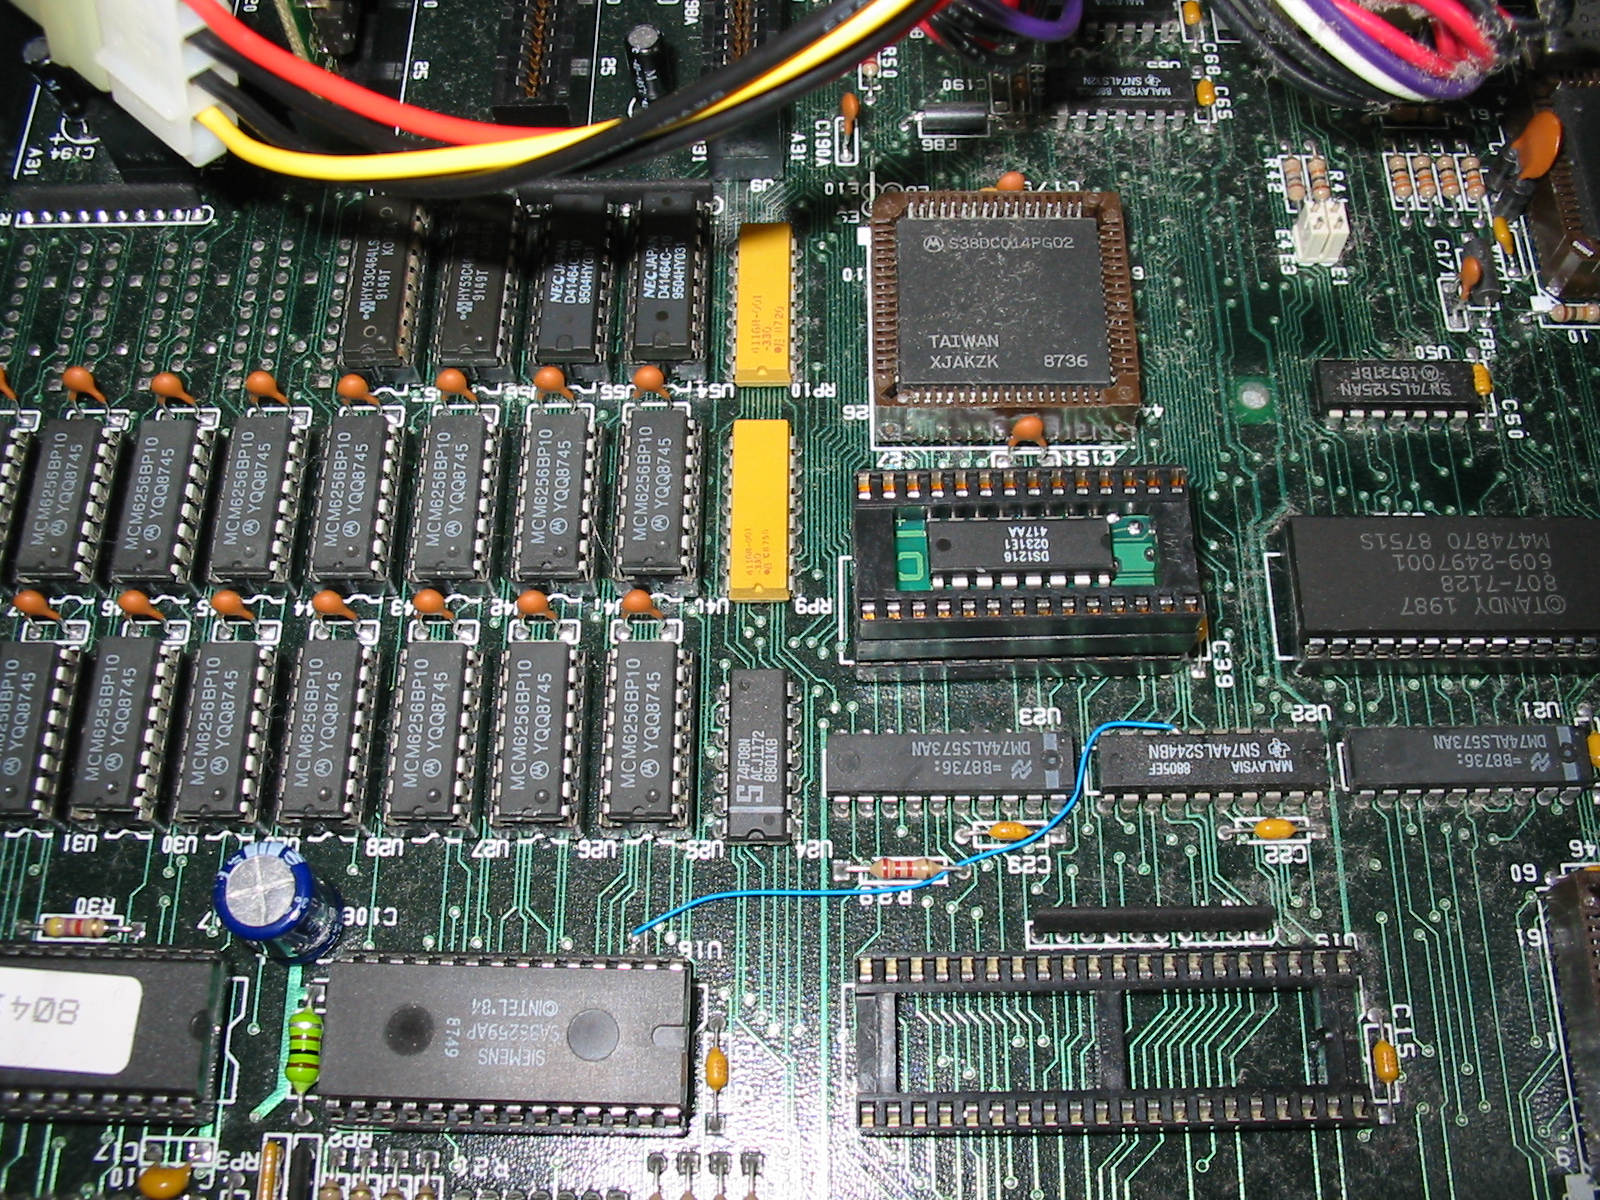
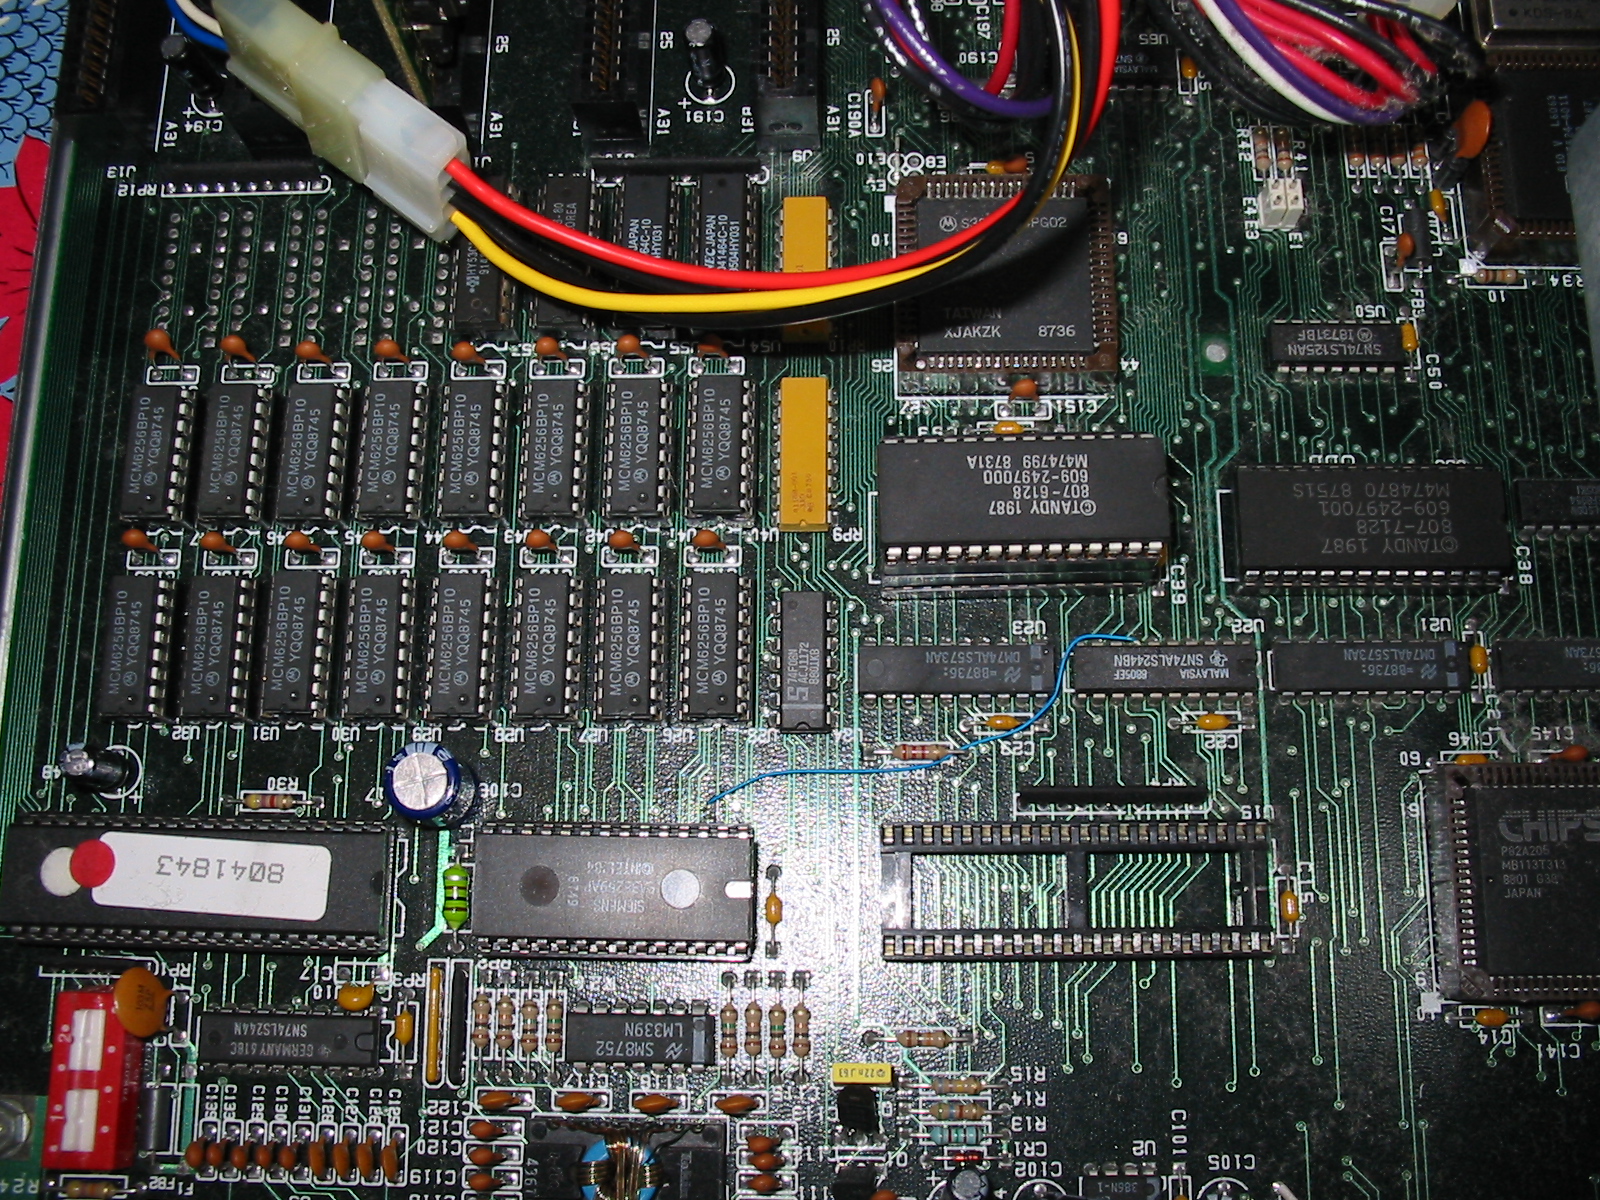
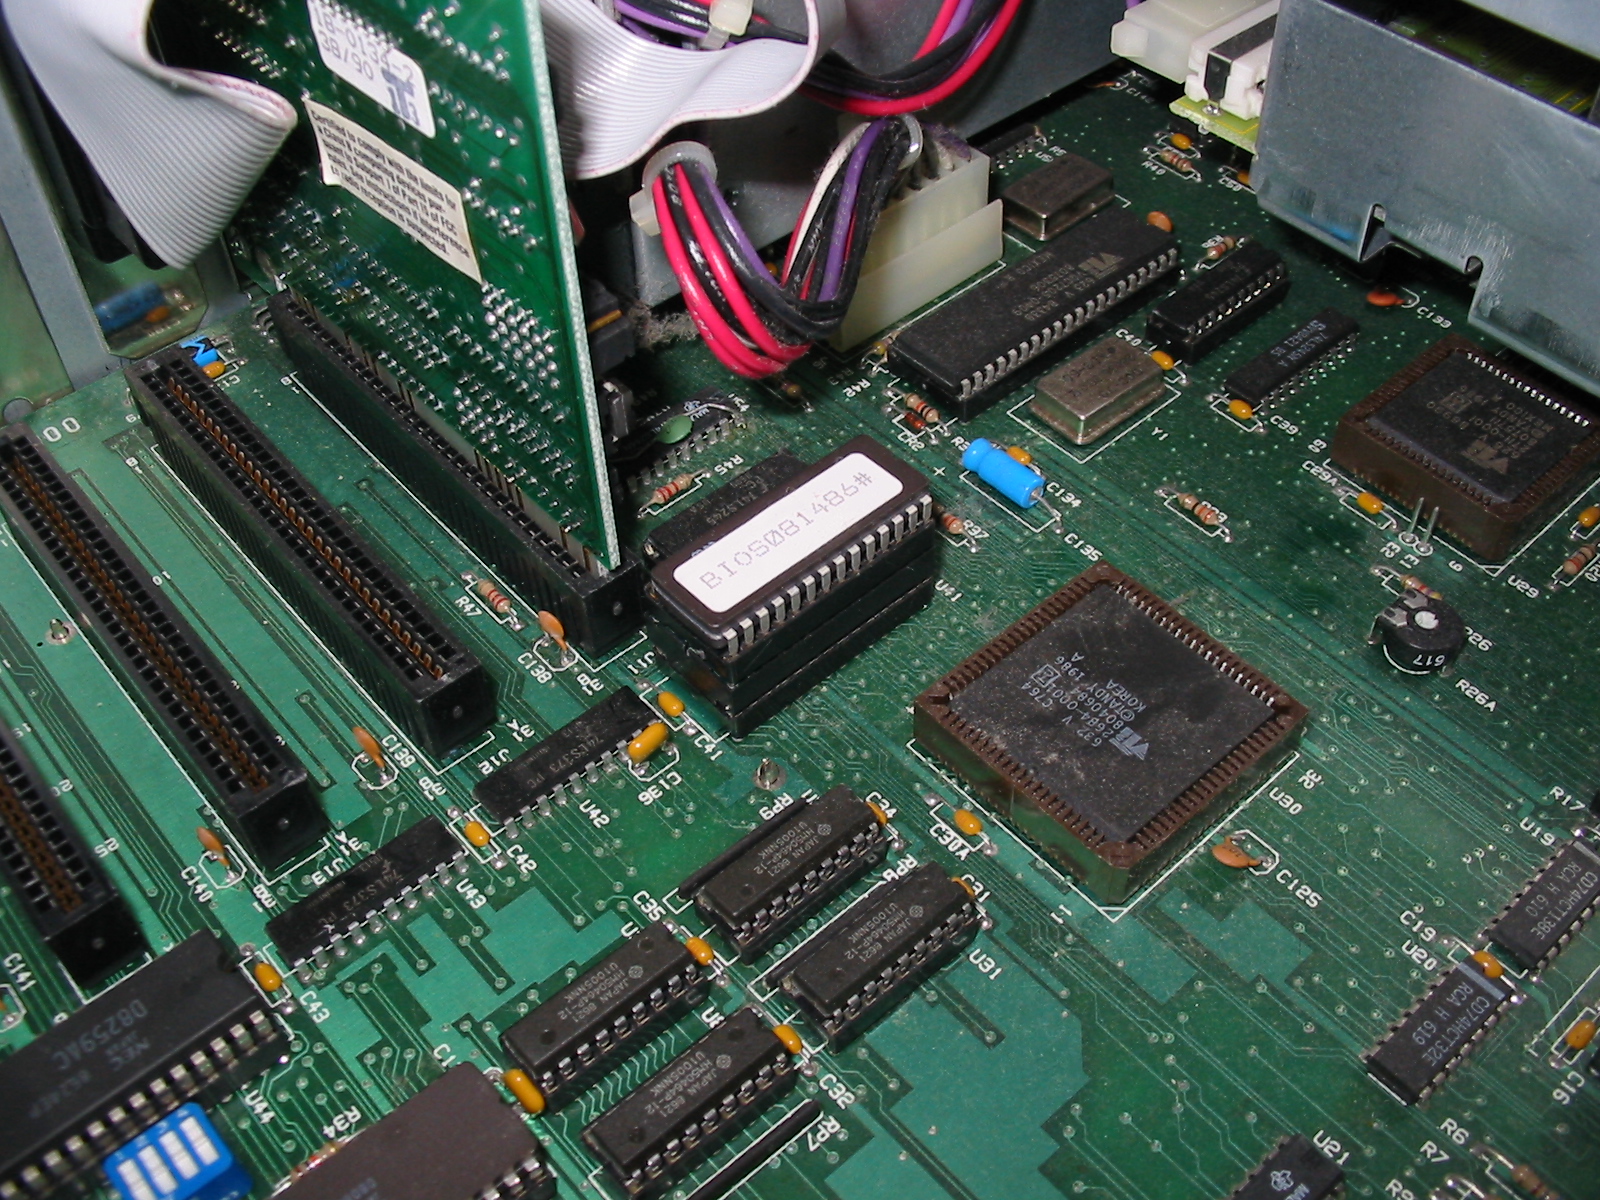
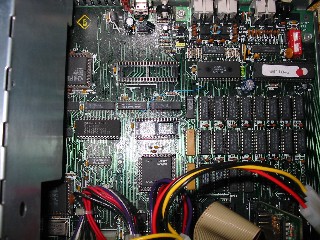
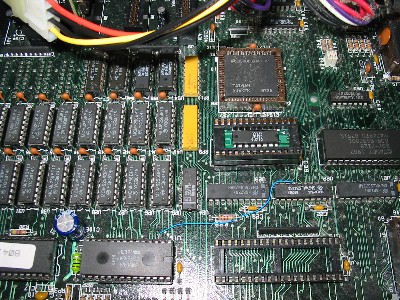
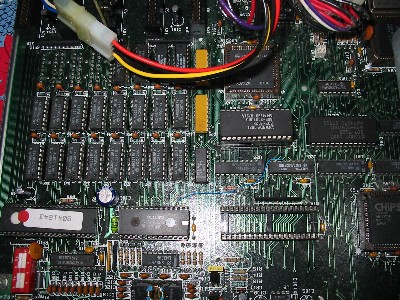
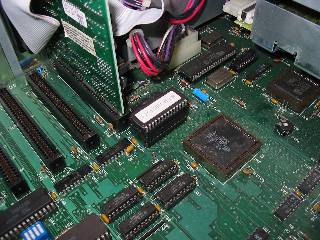  Like
the TX, the
SX takes a Smartwatch chip to add a real-time clock. At left you see it installed under the
BIOS chip in front of the innermost expansion slot. As with the TX, this means
that the hard card can't be in that slot. The 4 DIP switches in the bottom left
corner of the picture are the same as in the TX. Like
the TX, the
SX takes a Smartwatch chip to add a real-time clock. At left you see it installed under the
BIOS chip in front of the innermost expansion slot. As with the TX, this means
that the hard card can't be in that slot. The 4 DIP switches in the bottom left
corner of the picture are the same as in the TX.
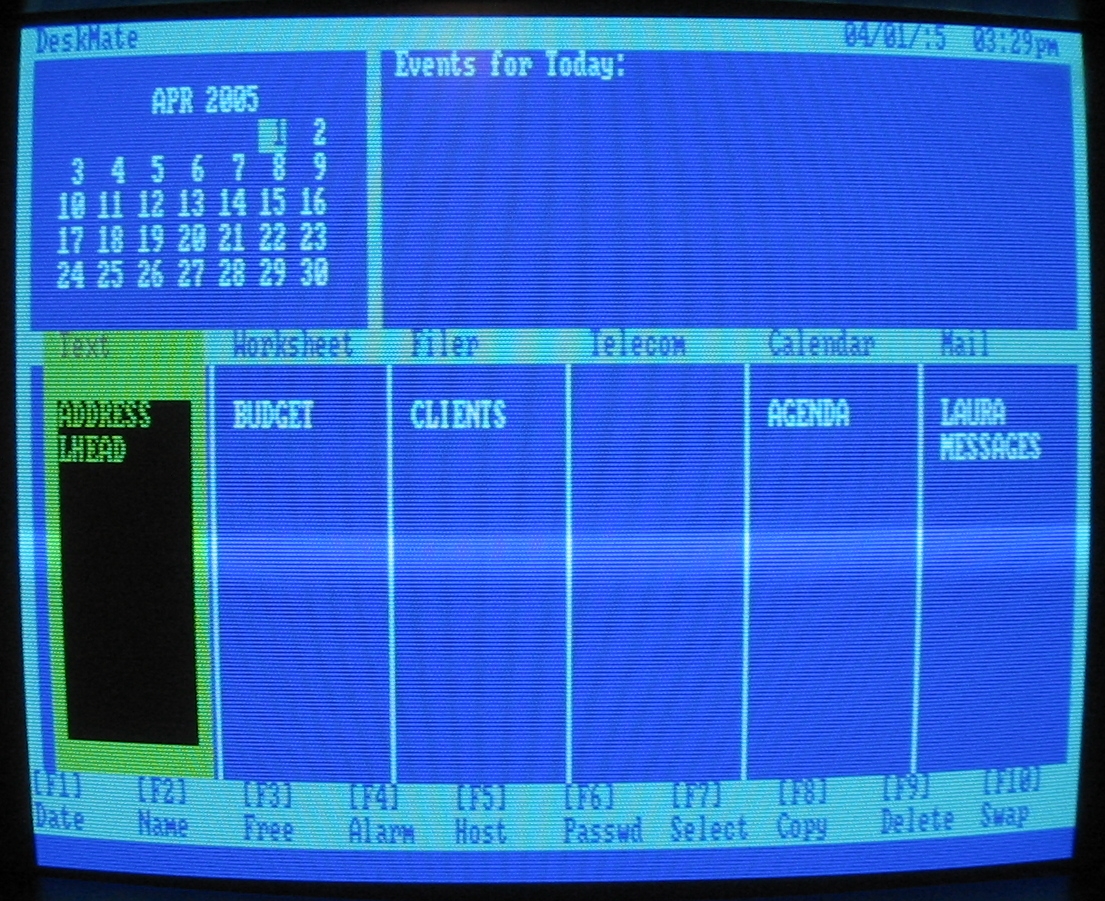
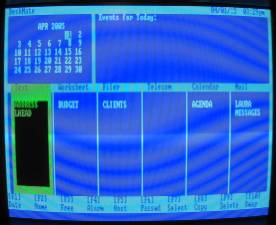
Right: DeskMate II. This version of DeskMate is text-based and operated
using hotkeys, though there are some underlying similarities to the later
graphical versions. Earlier Tandy computers (such as the TRS-80's) also had
text-based DeskMate versions. This MS-DOS one allows the screen colors to be
changed. I find DeskMate II much harder to use than DeskMate 3.0x (and if you
don't have the manual, forget it), but some people liked it.
Go back to Tvdog's Home Page.
|