| Tandy 1000RL/RLX Pictures Produced towards the end of the 1000-series line, the 1000RL,
RLX and RSX were "slim-line" models marketed
as complete, self-contained, low-cost systems for the home or home office. Click on
any picture to see a larger version.
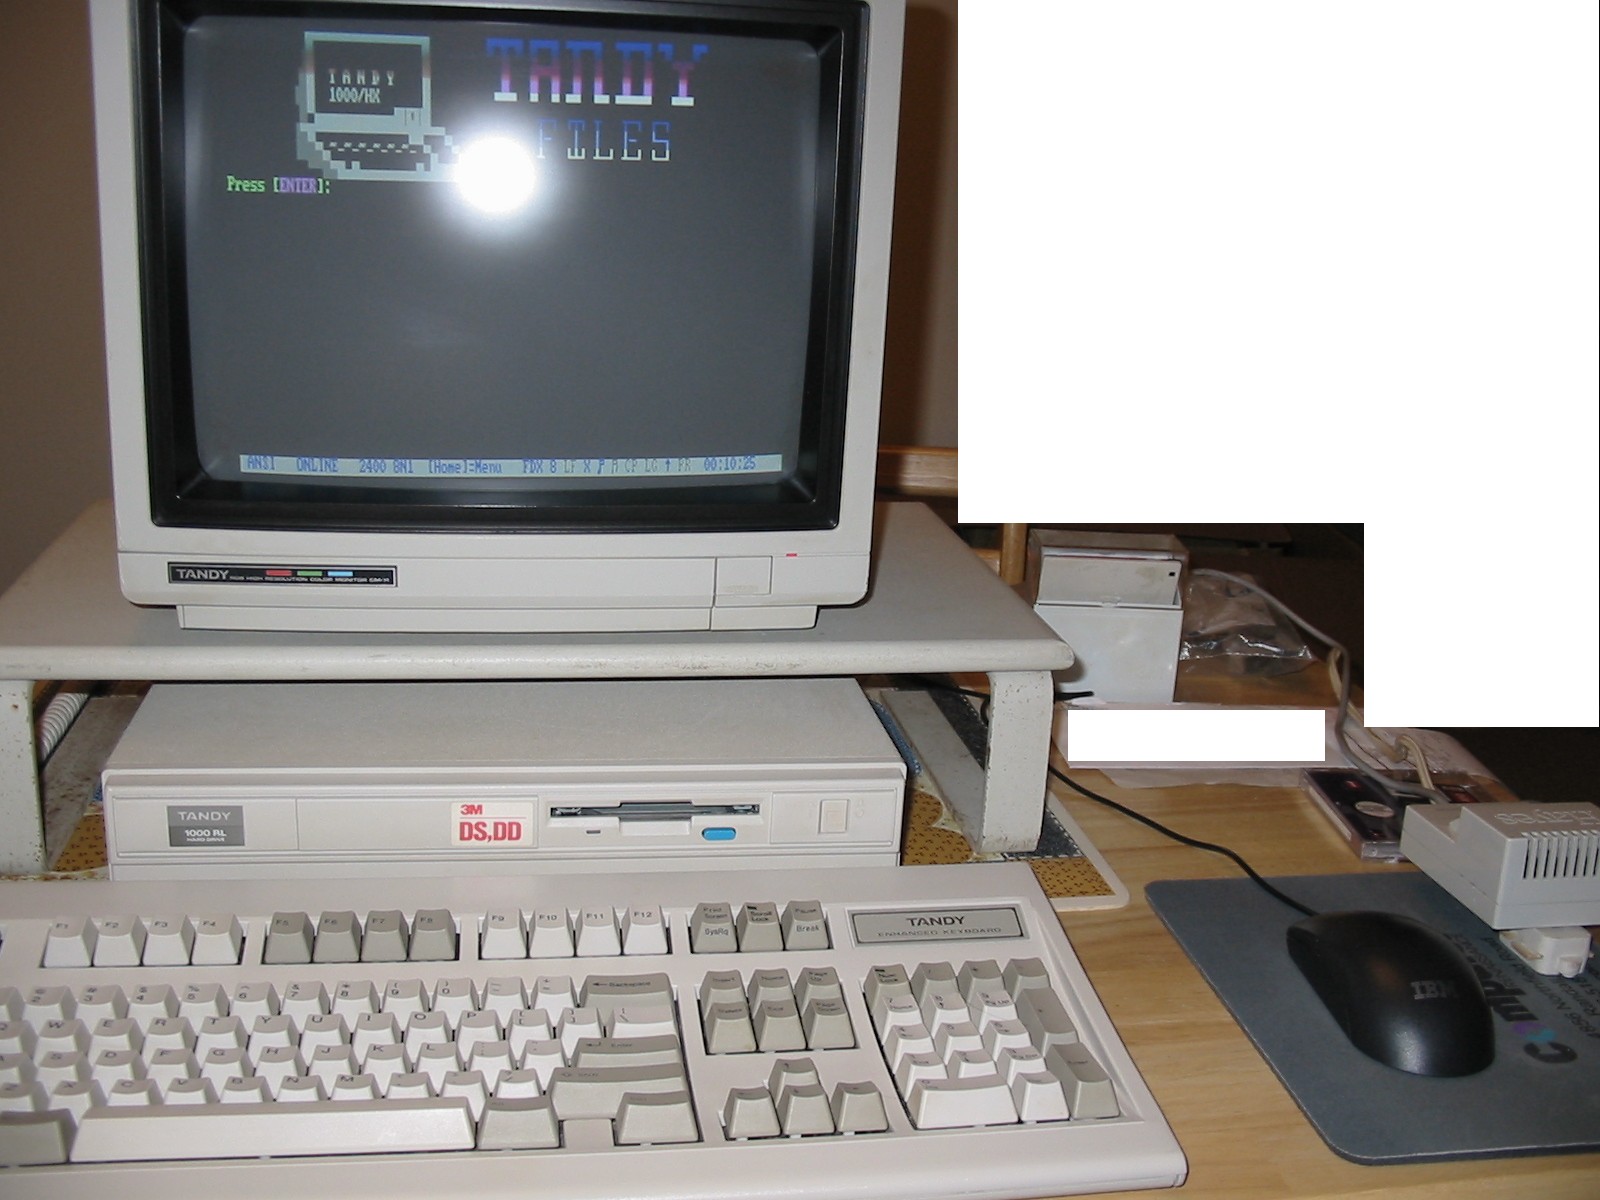
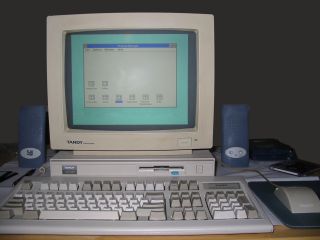
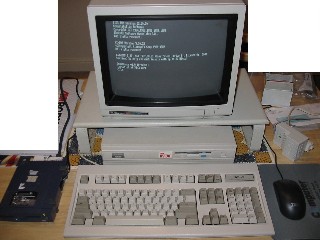 At
left, the RL booting Tandy DOS 3.3. The PS/2 mouse is standard but not
every driver will work with the RL's mouse port;
CuteMouse
v1.9 will, though, as here. The Zip drive shown is attached to an I/O card
installed in the RL's one and only expansion slot (see below). The external
modem beside the mouse is connected to the same card. At
left, the RL booting Tandy DOS 3.3. The PS/2 mouse is standard but not
every driver will work with the RL's mouse port;
CuteMouse
v1.9 will, though, as here. The Zip drive shown is attached to an I/O card
installed in the RL's one and only expansion slot (see below). The external
modem beside the mouse is connected to the same card.
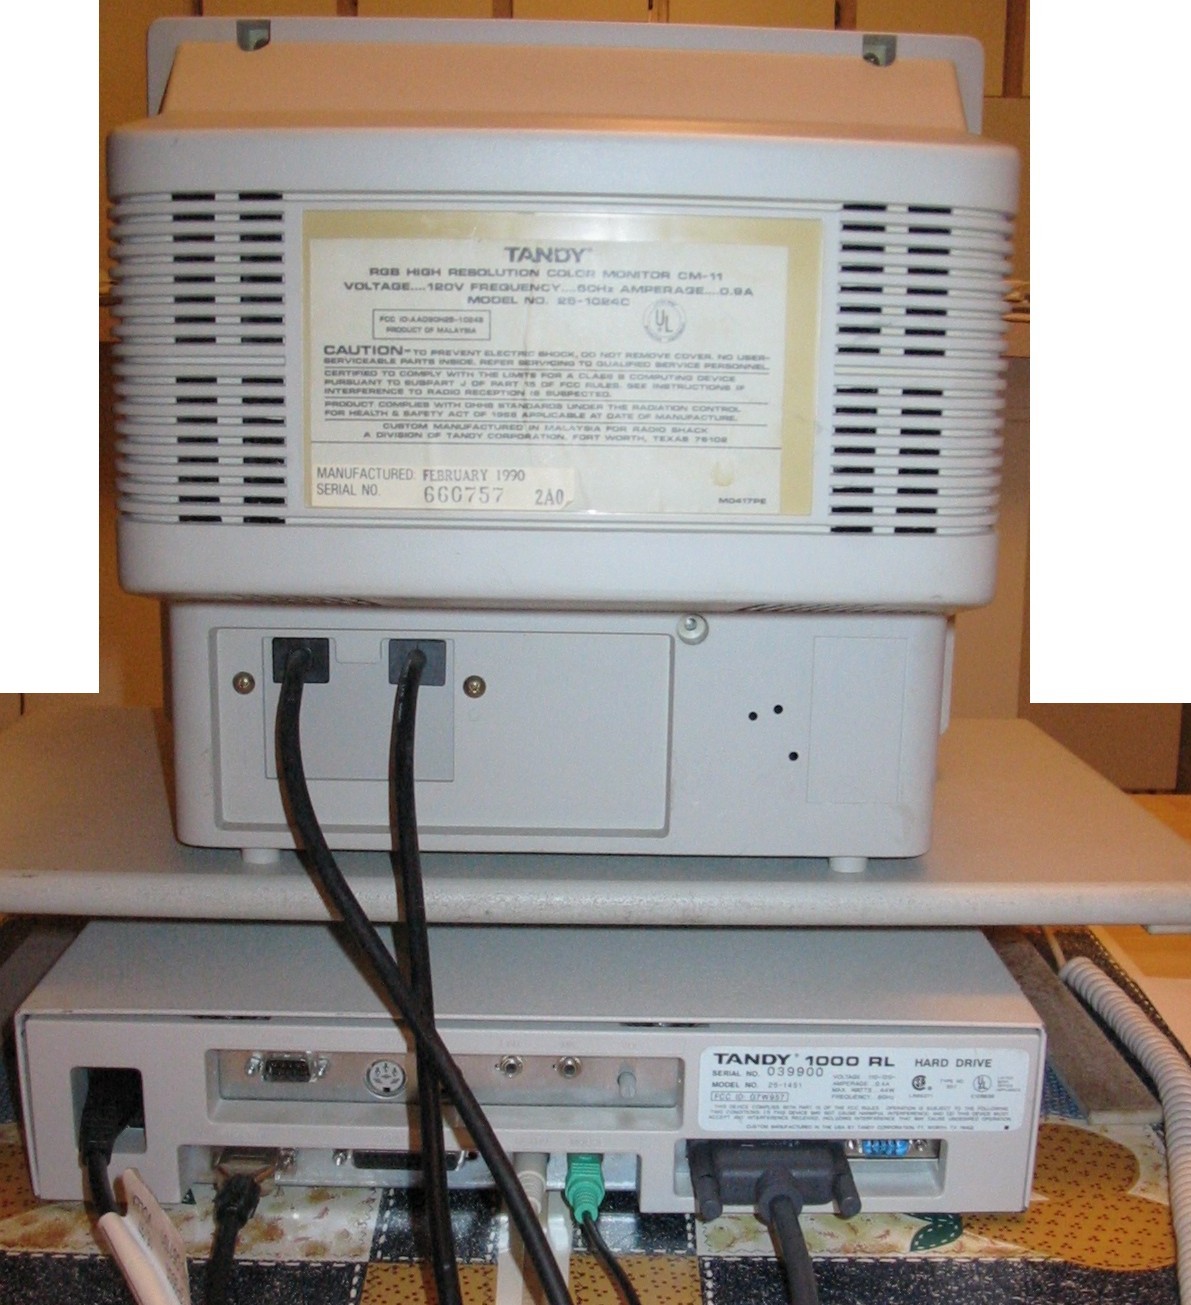
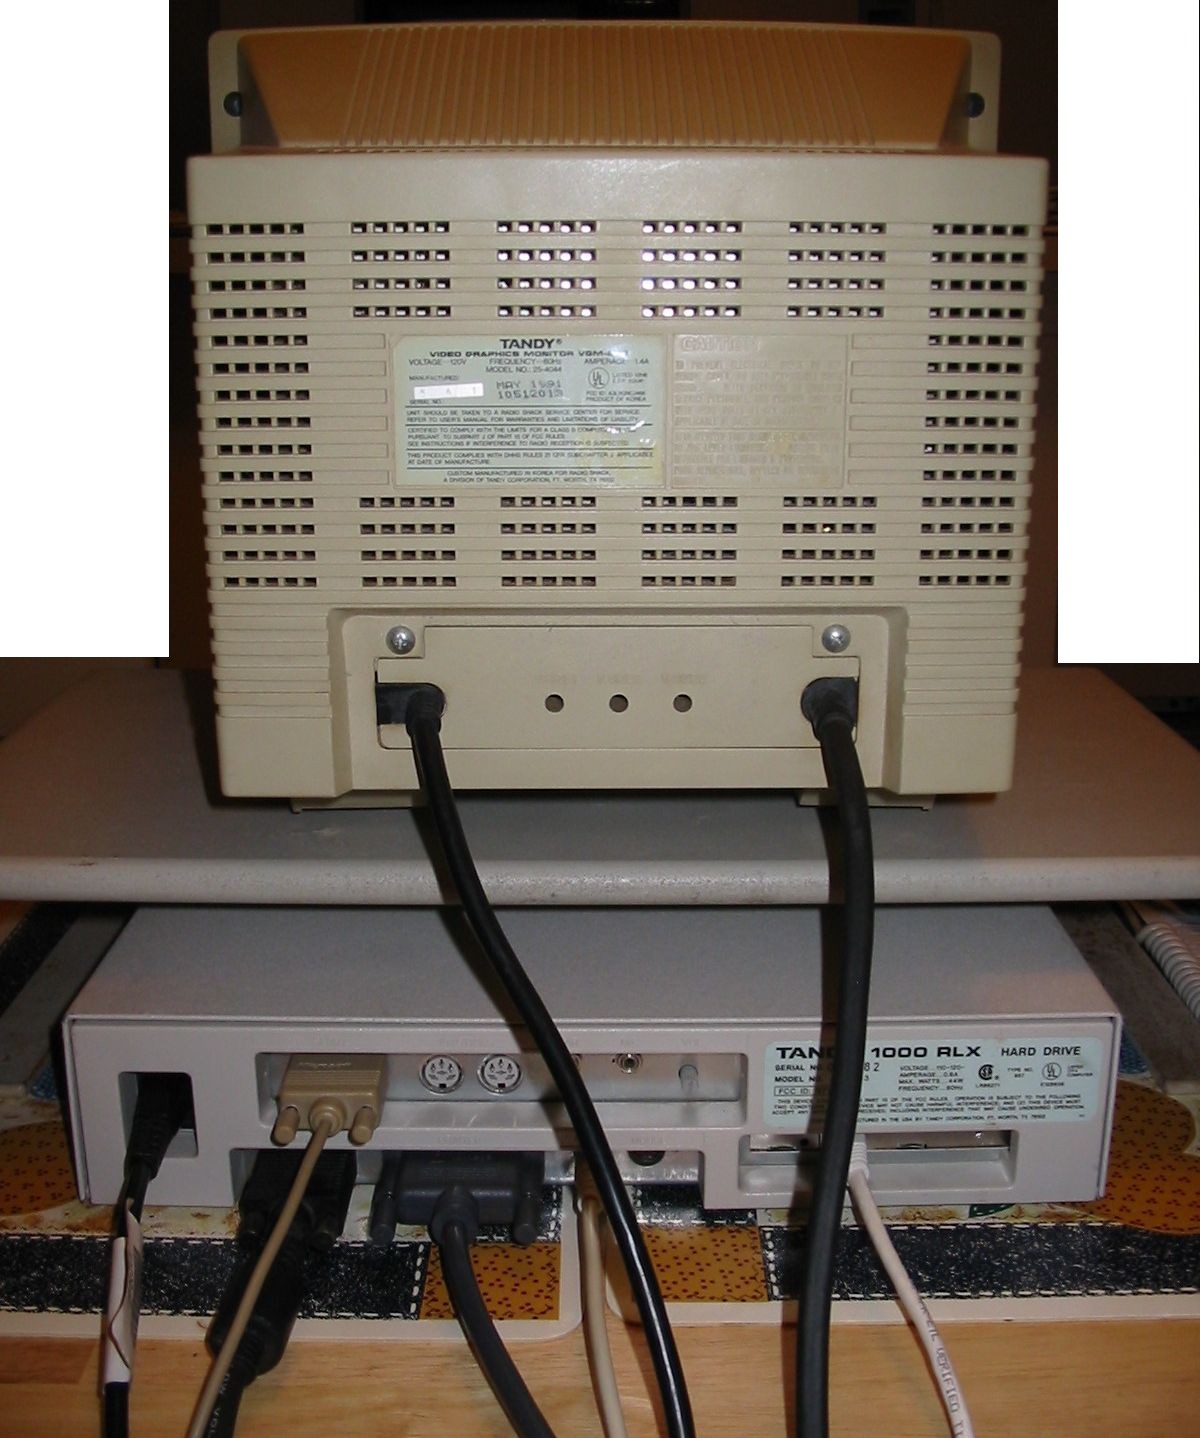
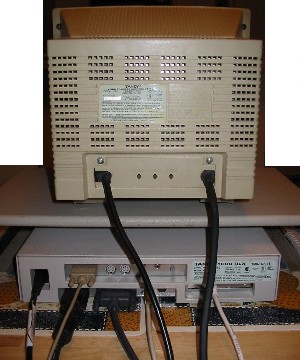
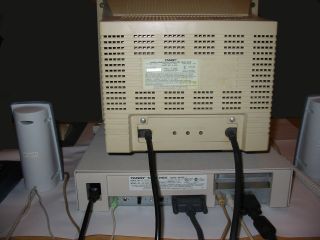
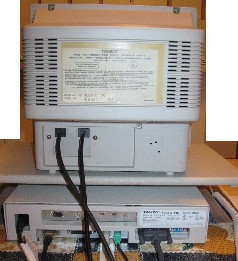 Right:
a view from the back. Like previous 1000-series models, the RL uses a CGA
monitor - a CM11 in this case. Right:
a view from the back. Like previous 1000-series models, the RL uses a CGA
monitor - a CM11 in this case.
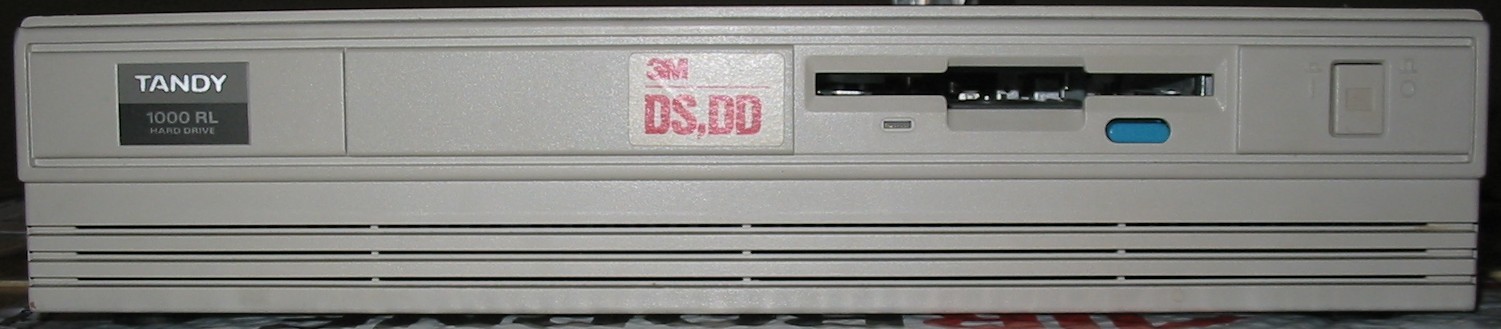
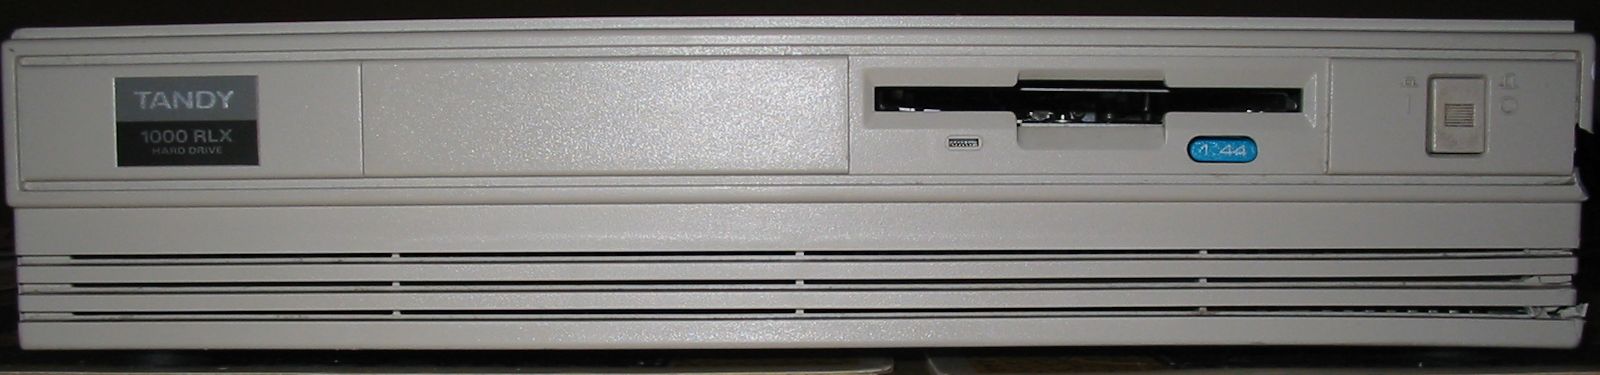
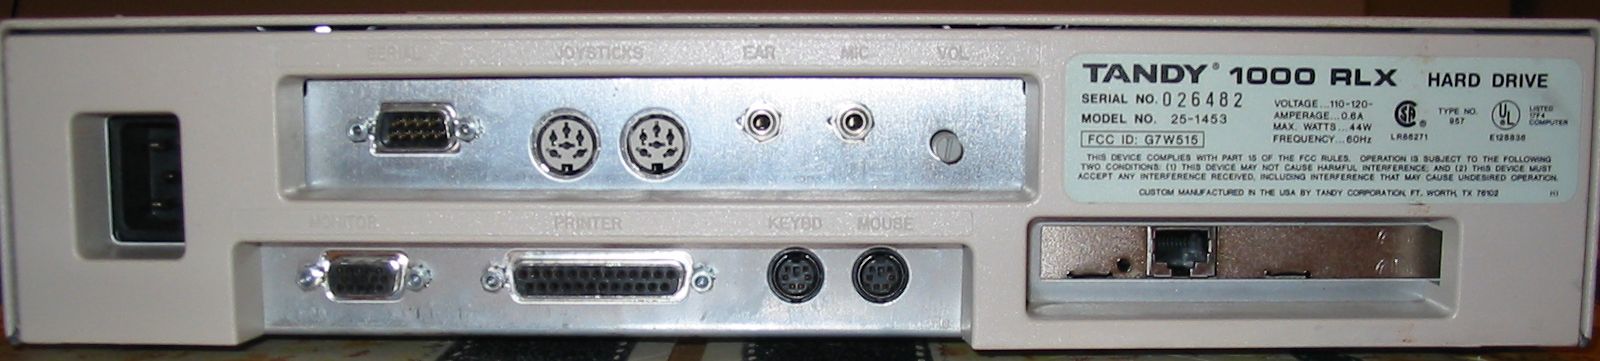
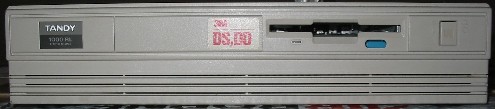
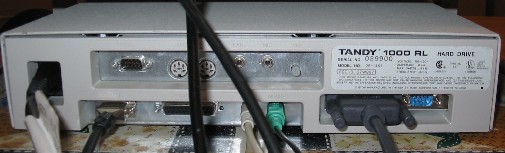
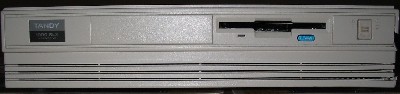
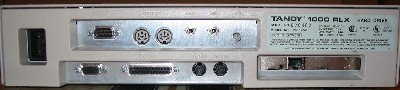
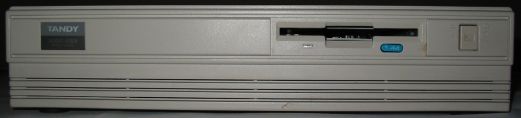
Below, the front and back of the machine. The "DS,DD" sticker on the front
isn't factory issue - I guess the previous owner needed reminding not to use
high-density disks :-). Note the two levels of ports on the back - the RL, which
is about the size of a large dinner plate, isn't wide enough to fit all the
ports otherwise. The top row (serial, joysticks, microphone, speakers, and
volume knob) are attached to a riser card (see
below).
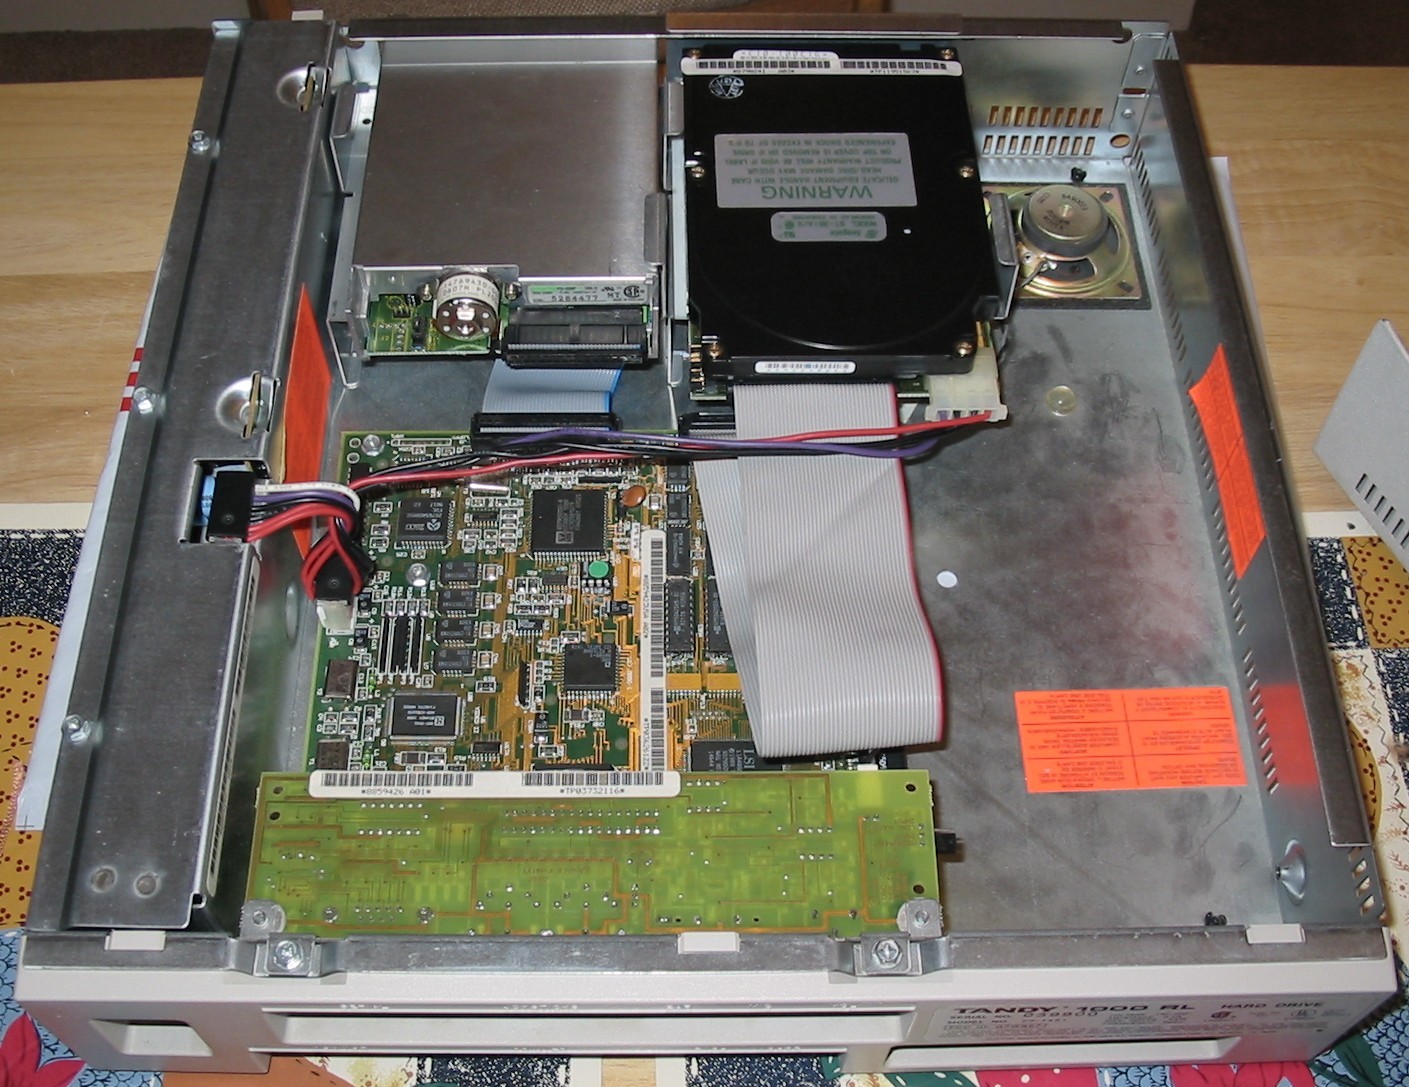
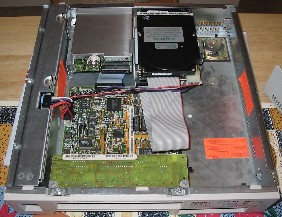
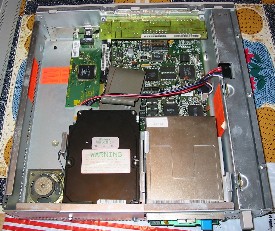
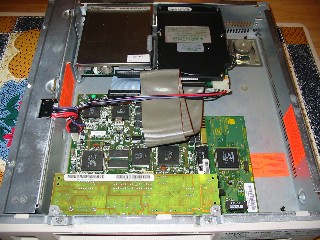
Right and below, front, back and side views
with the cover off. This is an RL-HD as you can see from the nameplate (above);
it came originally with a 20MB Seagate ST325X drive. The hard drive interface on
the motherboard supports XT IDE drives, an uncommon drive type and not
compatible with ATA drives that use the same connectors and cables. I replaced
the 20MB drive with a 40MB ST351A/X (the largest XT IDE drive made) from an
RLX-HD. The built-in partitioning utility that comes with the RL (AUTOFMT)
would have tried to partition that drive as a 20MB drive had I used it, but I
used FDISK and
FORMAT instead and had no trouble
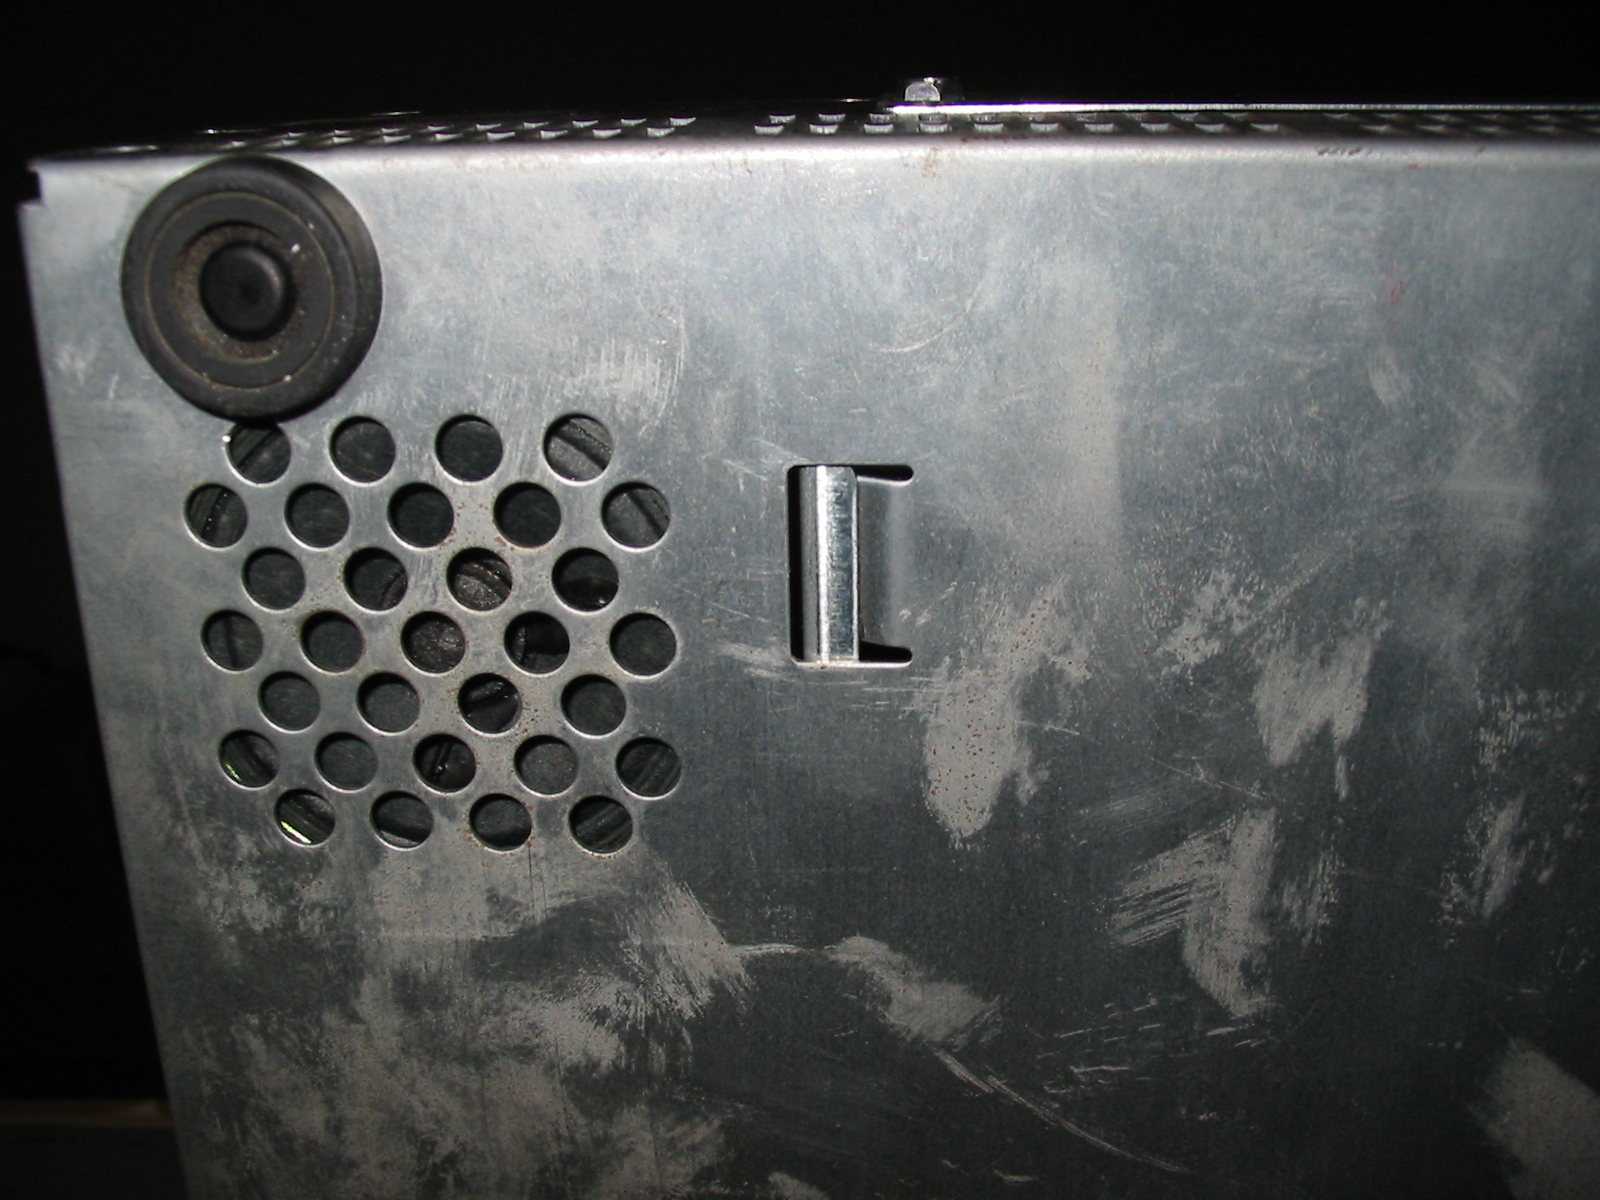
with the larger drive. Note the vents along the side - the RL has a 25W power
supply with no fan; according to the
Notes and
Jumpers manual, it "instead is cooled by strategically located vents." This
machine so quiet that it is nearly impossible to tell whether the power is on
without looking at the screen.
 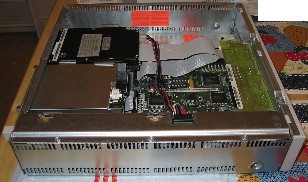
I have replaced the hard drive data cable with a longer
one; the original was very short like the floppy cable shown, making it
difficult to handle the drive. There is no slack in any part of this machine.
The power cable could have been an inch or so longer to make it easier to attach
it to the hard drive, for example - but that would have cost a few pennies more.
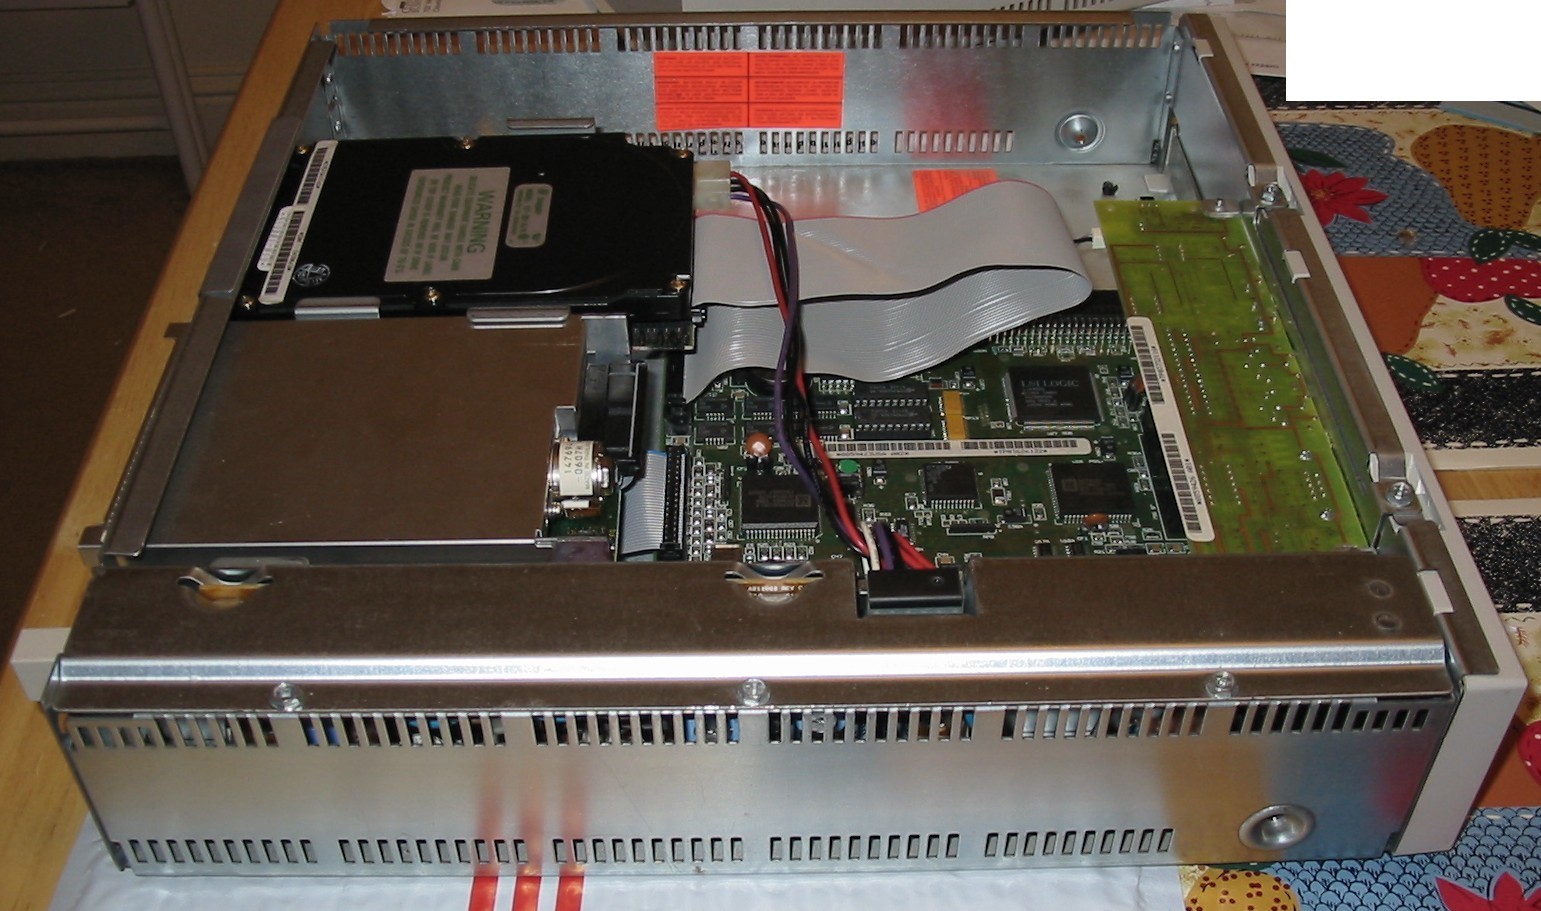
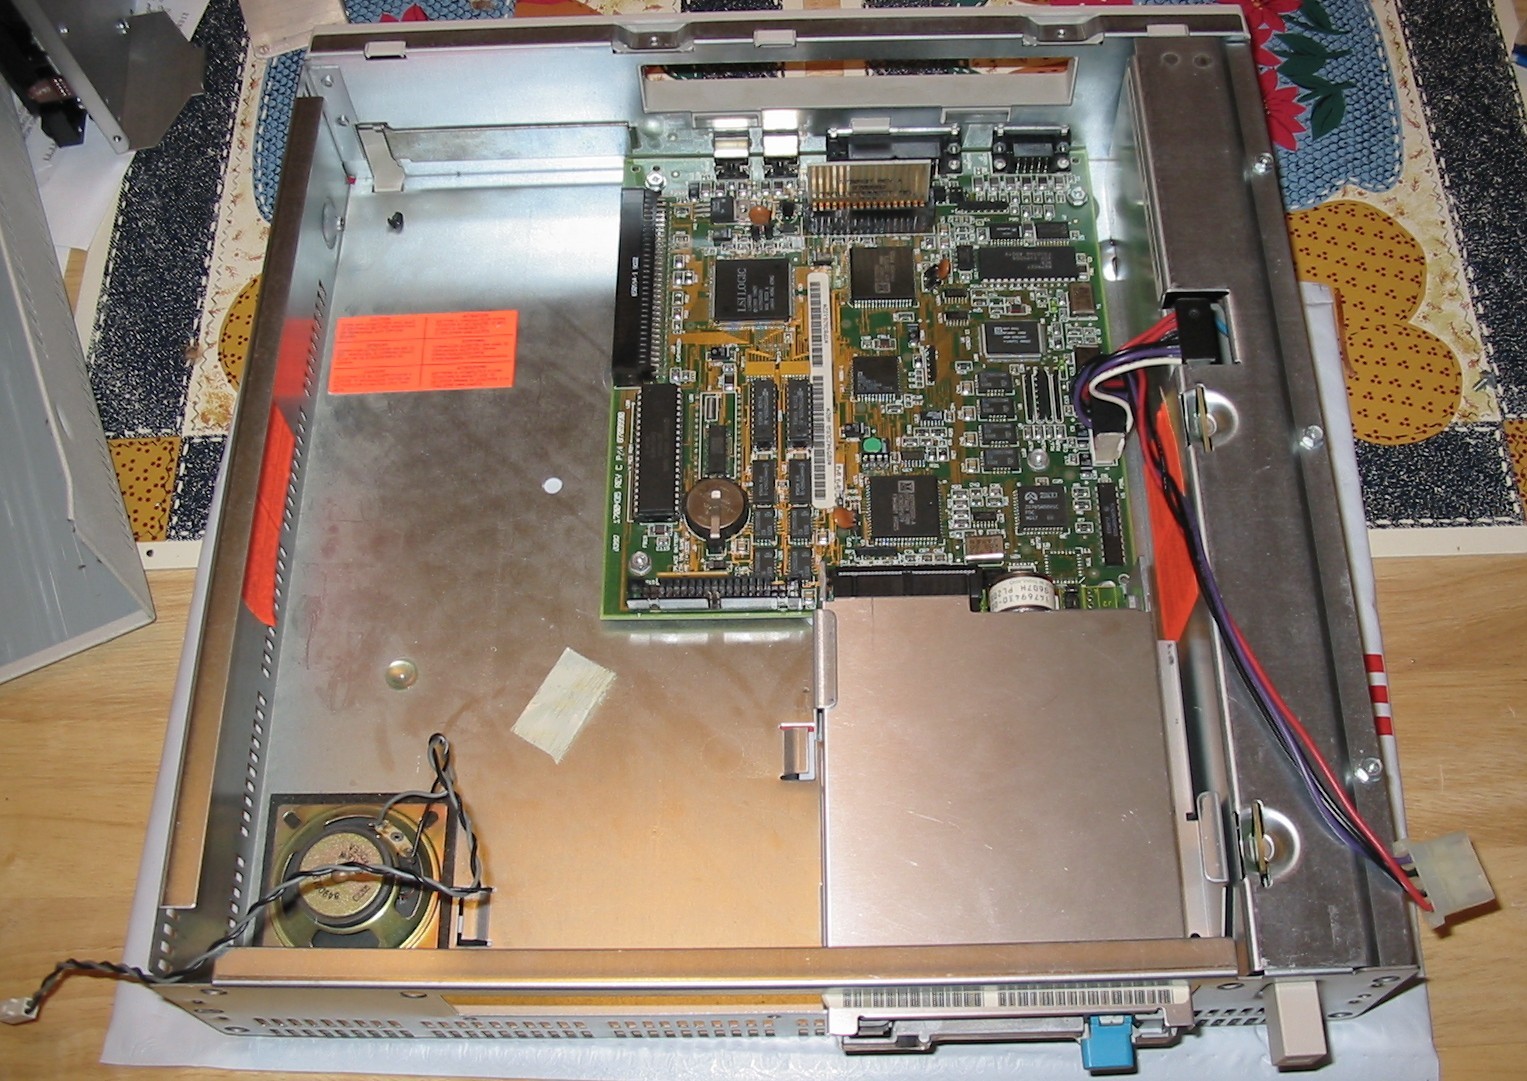
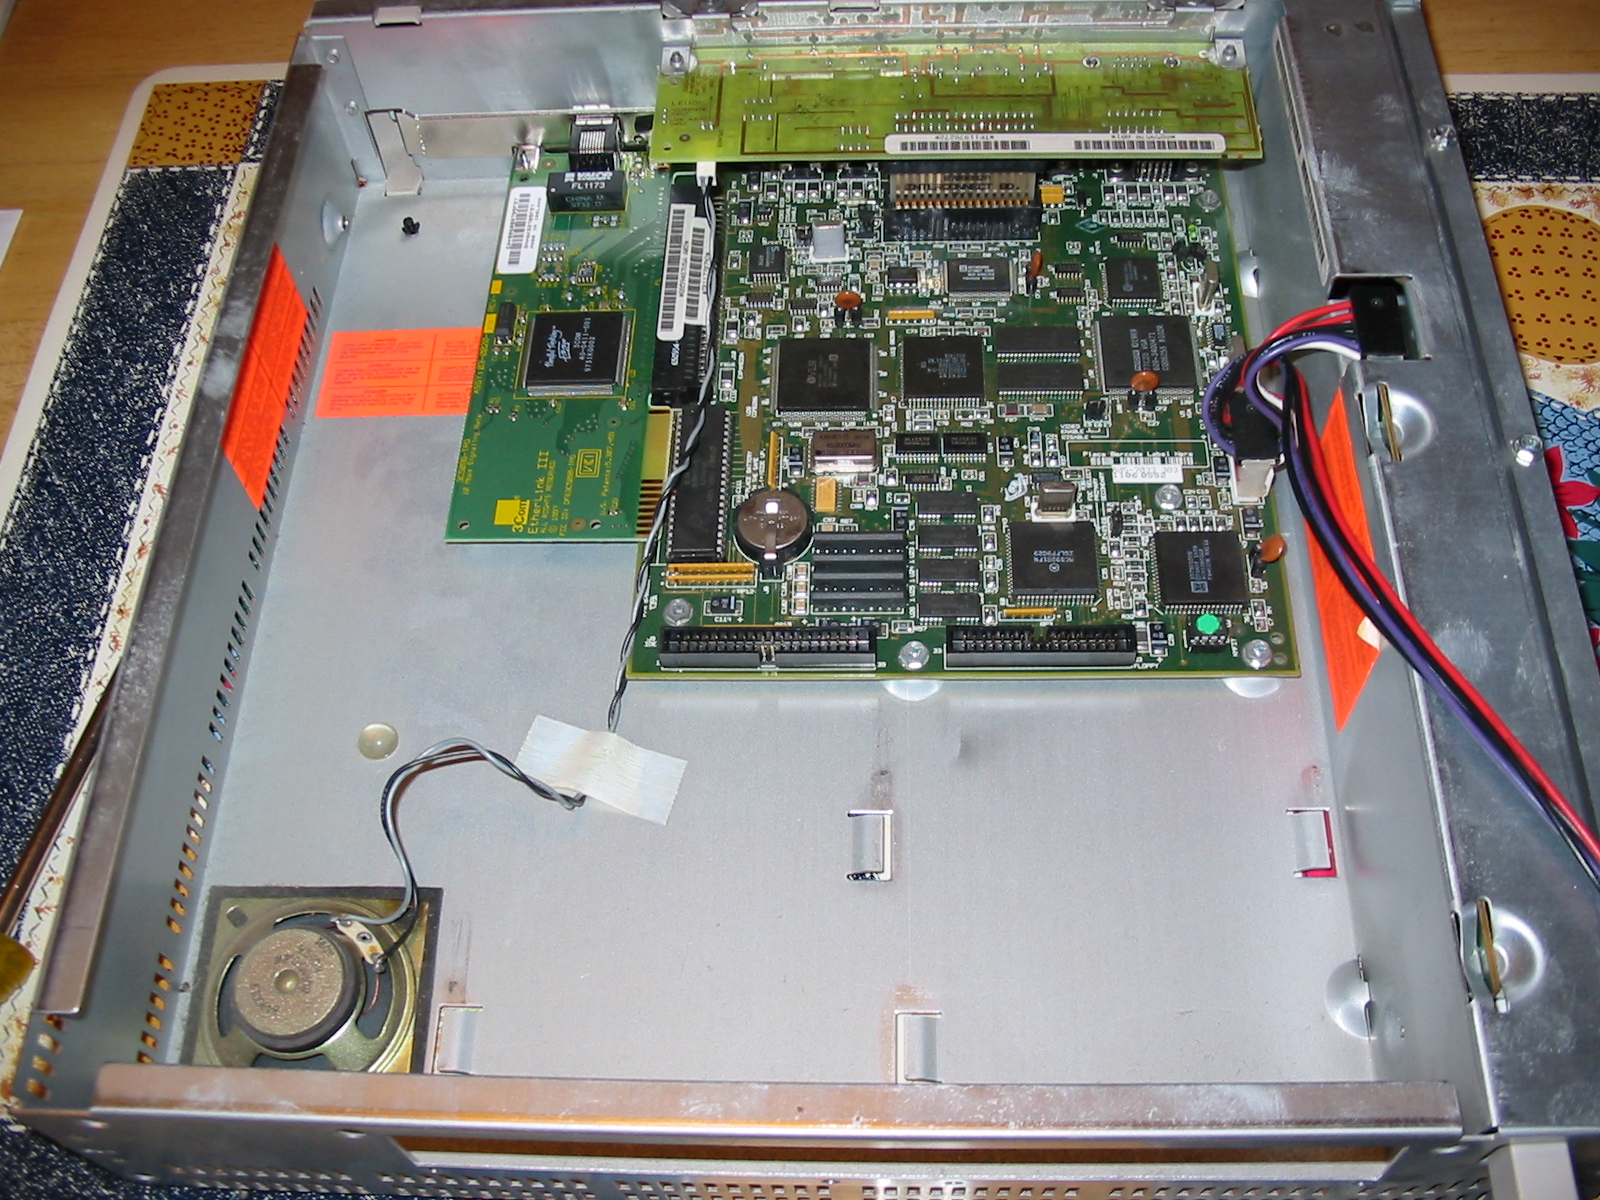
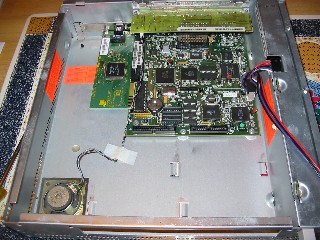
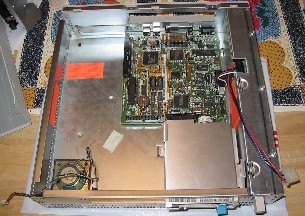 At
right is a view with the hard drive and riser card removed. The
motherboard in this machine is about the size of a man's hand with fingers
spread. At
right is a view with the hard drive and riser card removed. The
motherboard in this machine is about the size of a man's hand with fingers
spread.
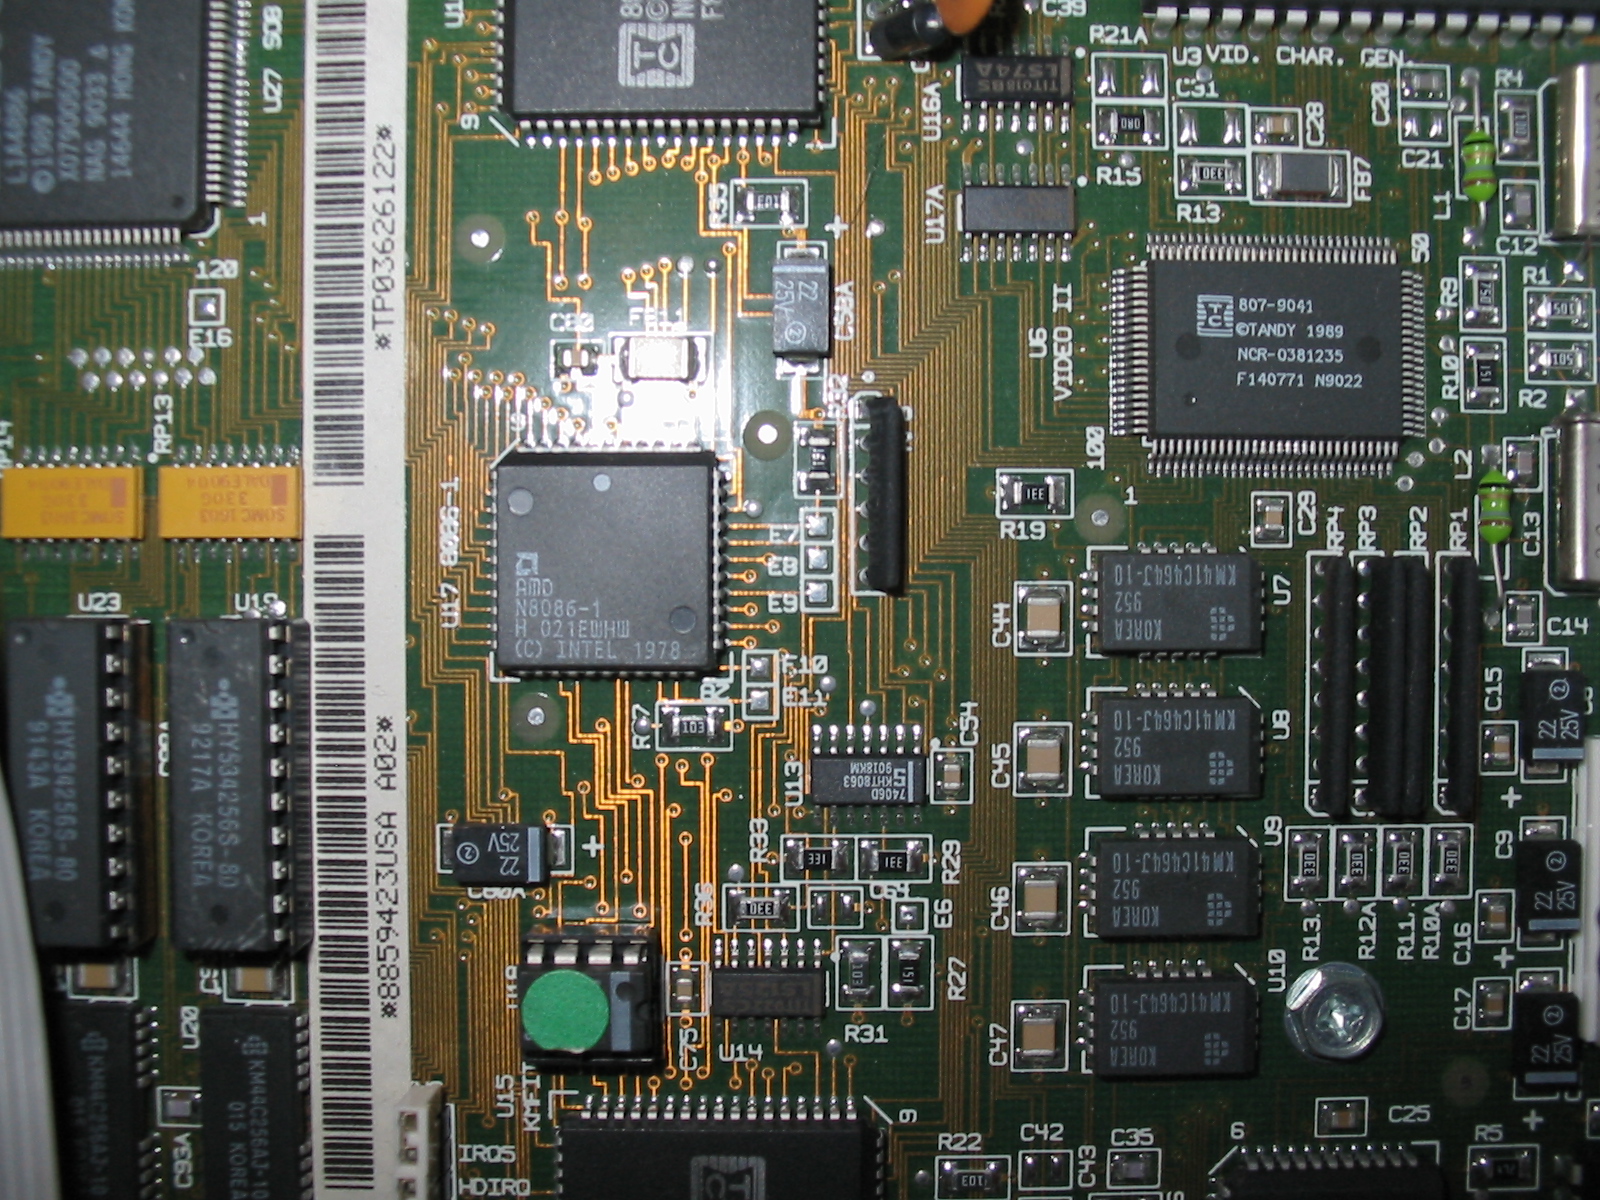
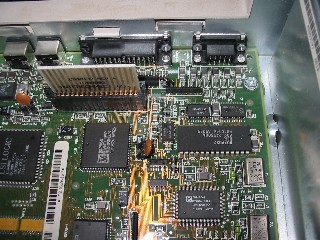
Below, some closeups showing the
8086 chip and the connectors at the rear of the motherboard. The 8086 is a
surface mounted chip about the size of a dime. Below and to the left of it are
two 256k x 4 DRAMs that I added to upgrade the machine to 768k (640k for DOS,
128k for the built-in video). The 8086 is not socketed (hence no V30 upgrade is
possible), and there is no math coprocessor socket.
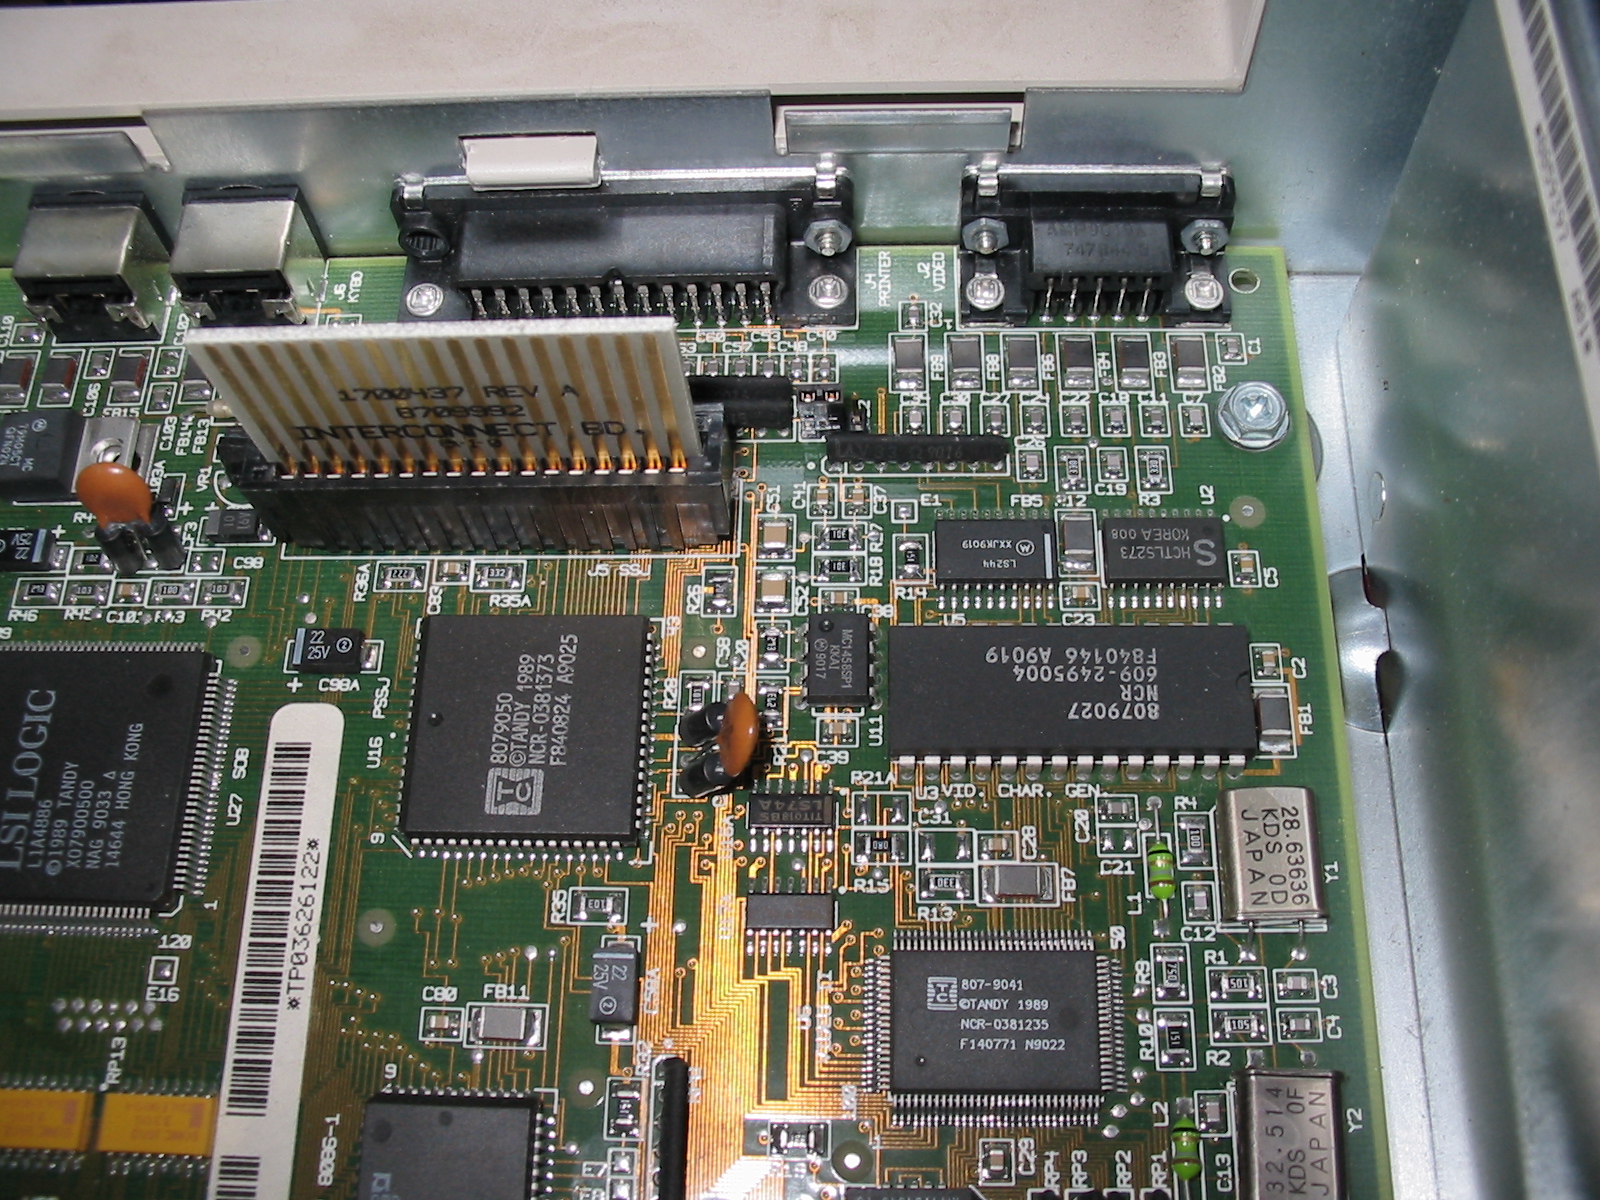
In the other picture you see the riser
card connector. In front of it is the PSSJ chip that controls the ports on the
riser. Behind it, the video port, the printer port, and the keyboard and mouse
ports. Of these, only the video port is somewhat standard; either a CGA or mono
TTL monitor can be attached. The printer port, although a 25-pin port, can only
be used with printers; no input is possible with this port (not even in "nibble
mode"). There is a PS/2 keyboard plug, but it requires an XT keyboard. Apart
from the Tandy Enhanced keyboard that came with the machine, an autoswitching
type of keyboard, probably no such XT keyboard with PS/2 plug ever existed (one
can attach an XT keyboard with DIN plug with an adapter). The PS/2 mouse port
uses standard mice, but not all mouse drivers will work with it because of
hardware incompatibilities.
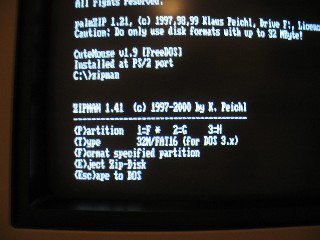 The
IOmega Zip DOS driver requires at least an 80286 running DOS 4.0 or later. To
use a Zip drive with the RL, I use
Palmzip instead. At
right is a screen shot showing the partitioning and format utility
that comes with Palmzip. As indicated, with DOS 3.3 a 100MB Zip disk is
partitioned into 3 parts. The first partition is readable by the standard Zip
driver so files can be transferred. The
IOmega Zip DOS driver requires at least an 80286 running DOS 4.0 or later. To
use a Zip drive with the RL, I use
Palmzip instead. At
right is a screen shot showing the partitioning and format utility
that comes with Palmzip. As indicated, with DOS 3.3 a 100MB Zip disk is
partitioned into 3 parts. The first partition is readable by the standard Zip
driver so files can be transferred.
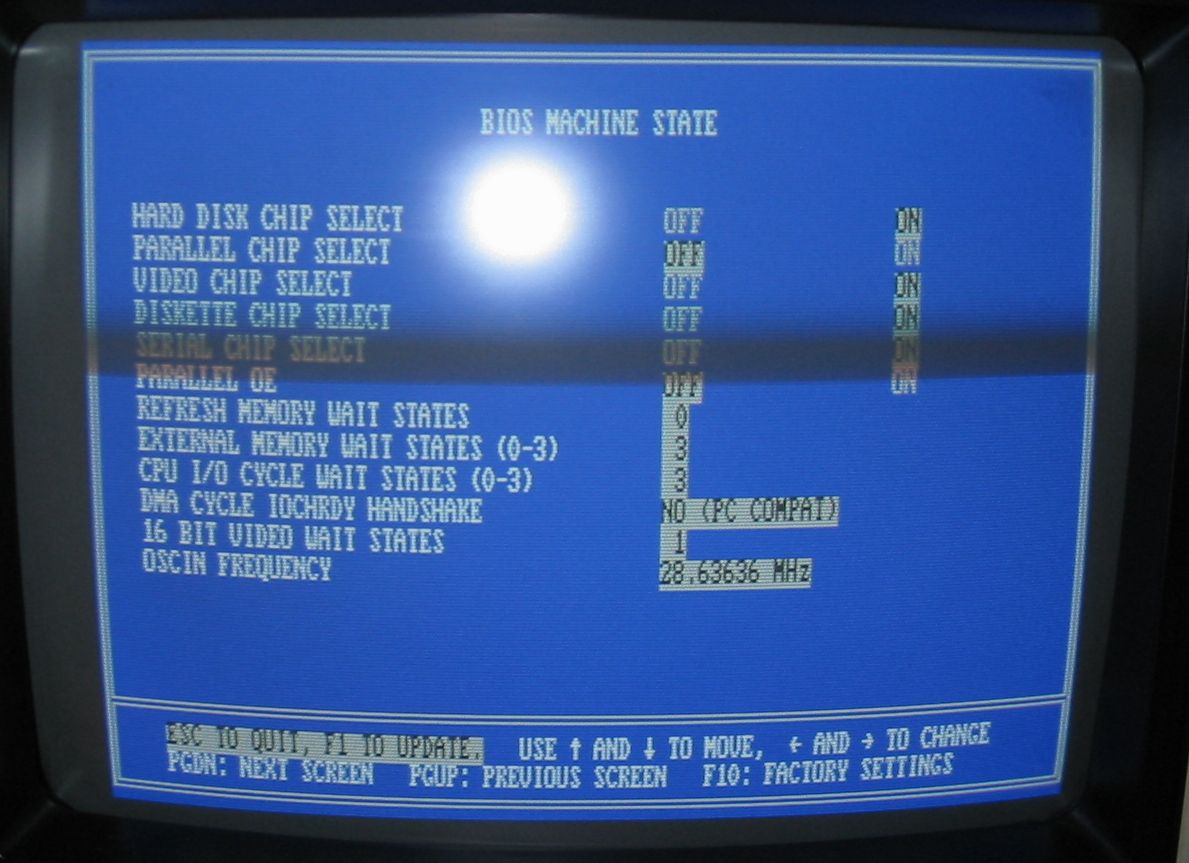
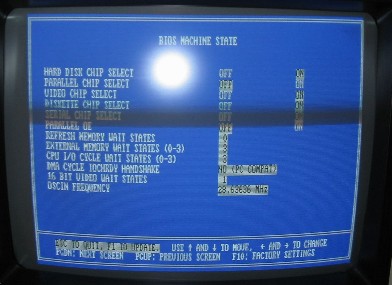 Also
required to use a parallel-port Zip drive is a parallel port :-), and the
built-in one on the RL would not work. I tried installing a parallel port on a
card and jumpering it as secondary, but that conflicted with the hard drive.
Instead, the new parallel port needed to be primary. To accomplish that, the
built in port needs to be disabled. The screen shot at left shows this
being done. This screen is displayed by running Also
required to use a parallel-port Zip drive is a parallel port :-), and the
built-in one on the RL would not work. I tried installing a parallel port on a
card and jumpering it as secondary, but that conflicted with the hard drive.
Instead, the new parallel port needed to be primary. To accomplish that, the
built in port needs to be disabled. The screen shot at left shows this
being done. This screen is displayed by running SETUPRL /A.
Right: the RL connected to the
WakaWaka BBS using
Qmodem for DOS and a Hayes external modem.
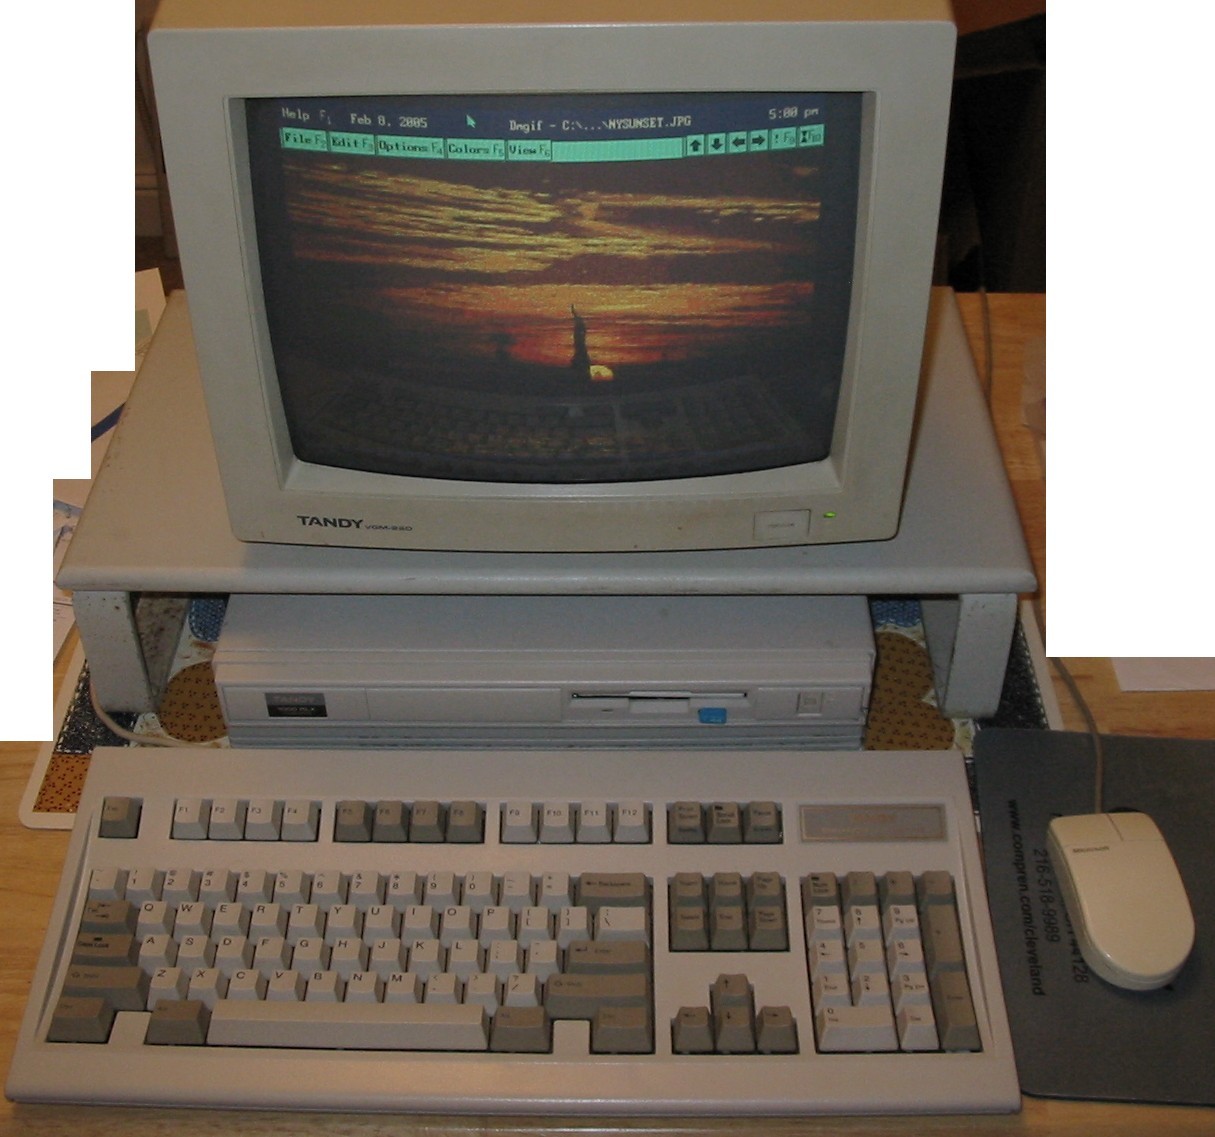
Below: The 1000RLX is the "big brother" of the RL, and although it is very
similar in appearance, the RLX is very different at a hardware level. One of
these differences is VGA.
At right, a view from the rear.
Like the RL, the RLX has only one 8-bit expansion slot. I am using it for a
network card. The parallel port in the RLX is bidirectional and works well with
a Zip drive. I am using a serial mouse instead of the built in PS/2 mouse port,
which is not compatible with Windows (see below).
The front and back of the machine are shown below. The ports on the
riser card are exactly the same as on the RL. The video port is VGA instead of
CGA, and the parallel port is bidirectional, as mentioned above. The keyboard
port on the RLX is standard (uses an AT keyboard), but the mouse port still is
not - it requires a special driver.
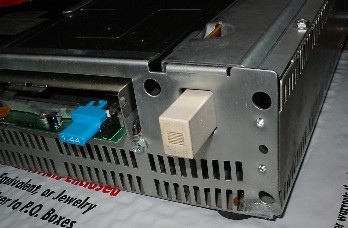
 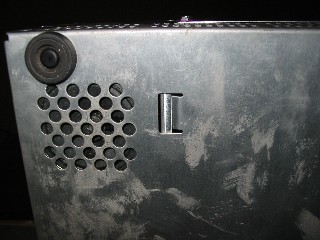 The
speaker on the RL and RLX is on the bottom of the machine, as shown at right. The
speaker on the RL and RLX is on the bottom of the machine, as shown at right.
Views inside the case from the front and back appear below. The layout is
very similar to the RL. The RLX-HD has an XT IDE interface like the RL, but it
comes with the Seagate ST351A/X. Also unlike the RL, the floppy drive is high
density. I have replaced the hard drive data cable.
Below, a picture of the RLX with
the drives removed.
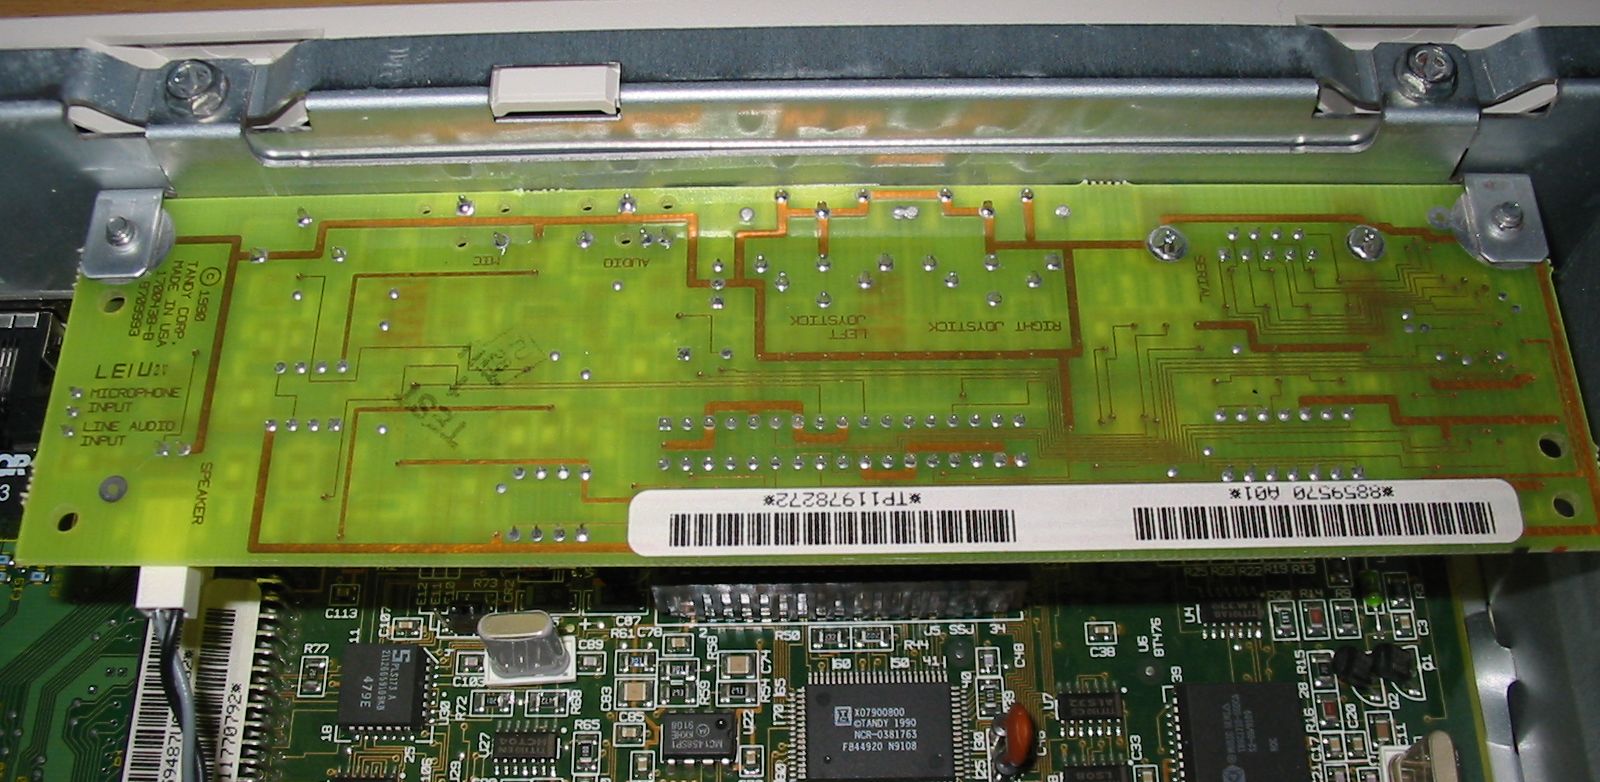
 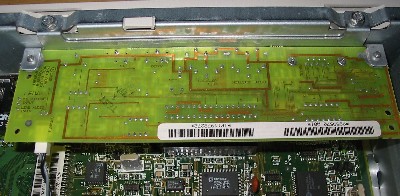 At
left, a closeup of the riser card that carries the serial, joystick,
microphone, and speaker ports. The chip that actually controls the ports is on
the motherboard, in front of the riser connector. At
left, a closeup of the riser card that carries the serial, joystick,
microphone, and speaker ports. The chip that actually controls the ports is on
the motherboard, in front of the riser connector.

At left is a picture of the system board. This
is the HD version of the RLX, and it came fully populated with 1MB RAM, the 4
soldered Zip chips next to the battery. The 286 chip, like the 8086 in the RL,
is surface mounted and not upgradeable, and there is no math coprocessor socket.
 The RLX
was not in very good shape when I got it. You can see the damage on the bezel in
the front view above; at right is a closer look. The sender didn't pack
the machine very well, and the mailman apparently dropped it on the corner,
smashing it. The floppy drive was destroyed (this is a replacement), but the
hard drive and power supply survived the impact. The RLX
was not in very good shape when I got it. You can see the damage on the bezel in
the front view above; at right is a closer look. The sender didn't pack
the machine very well, and the mailman apparently dropped it on the corner,
smashing it. The floppy drive was destroyed (this is a replacement), but the
hard drive and power supply survived the impact.
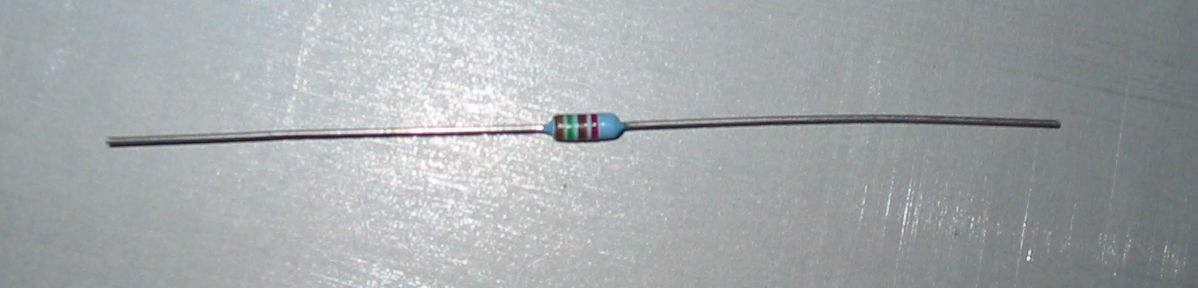
Apart from its physical damage, the machine would not
boot due to EEPROM corruption (the symptom of this is that the machine freezes
at the memory size or BIOS version display and refuses to boot further). To
recover, you need to use a 150 ohm 1/4W resistor like this one.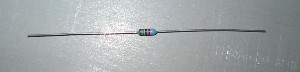
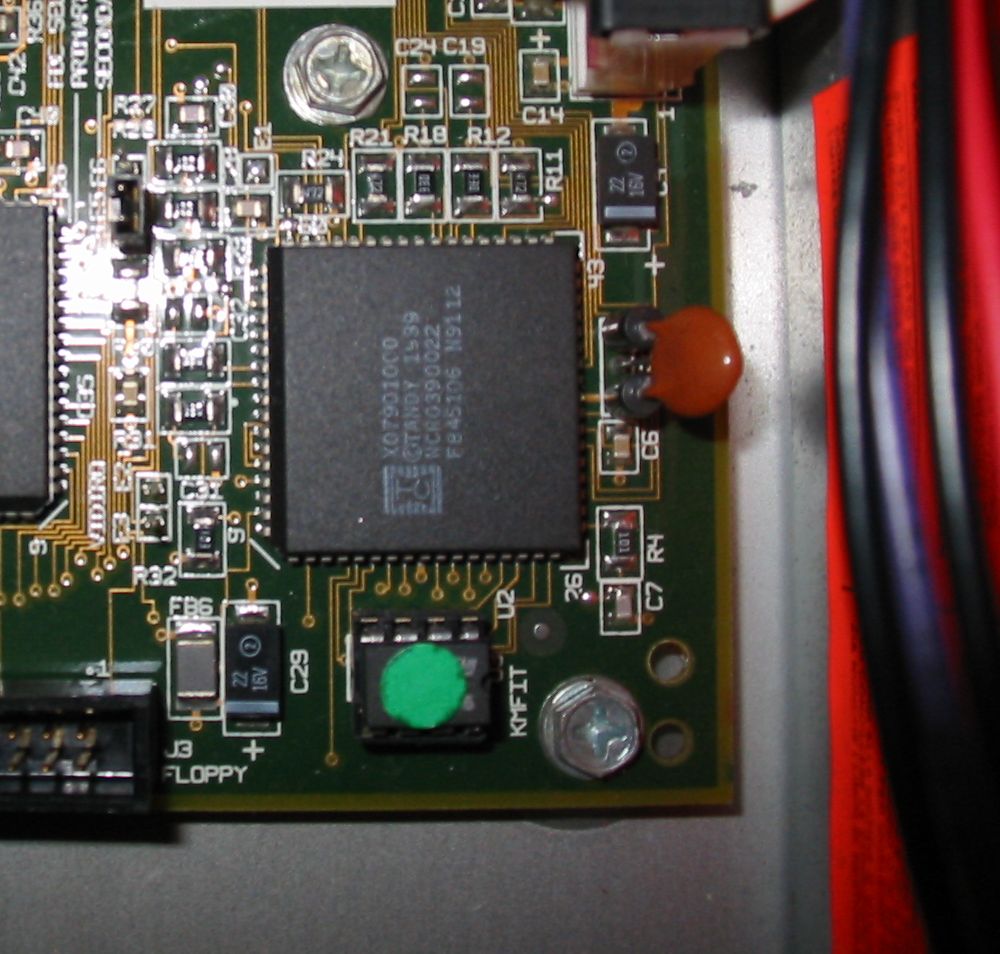
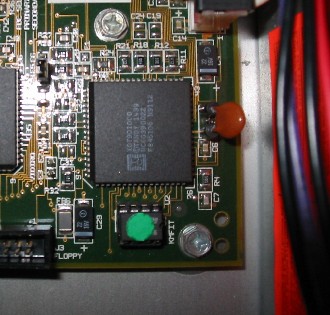  The
picture at far left shows the EEPROM, the chip with the green dot on it
in the corner of the system board. The
picture at far left shows the EEPROM, the chip with the green dot on it
in the corner of the system board.
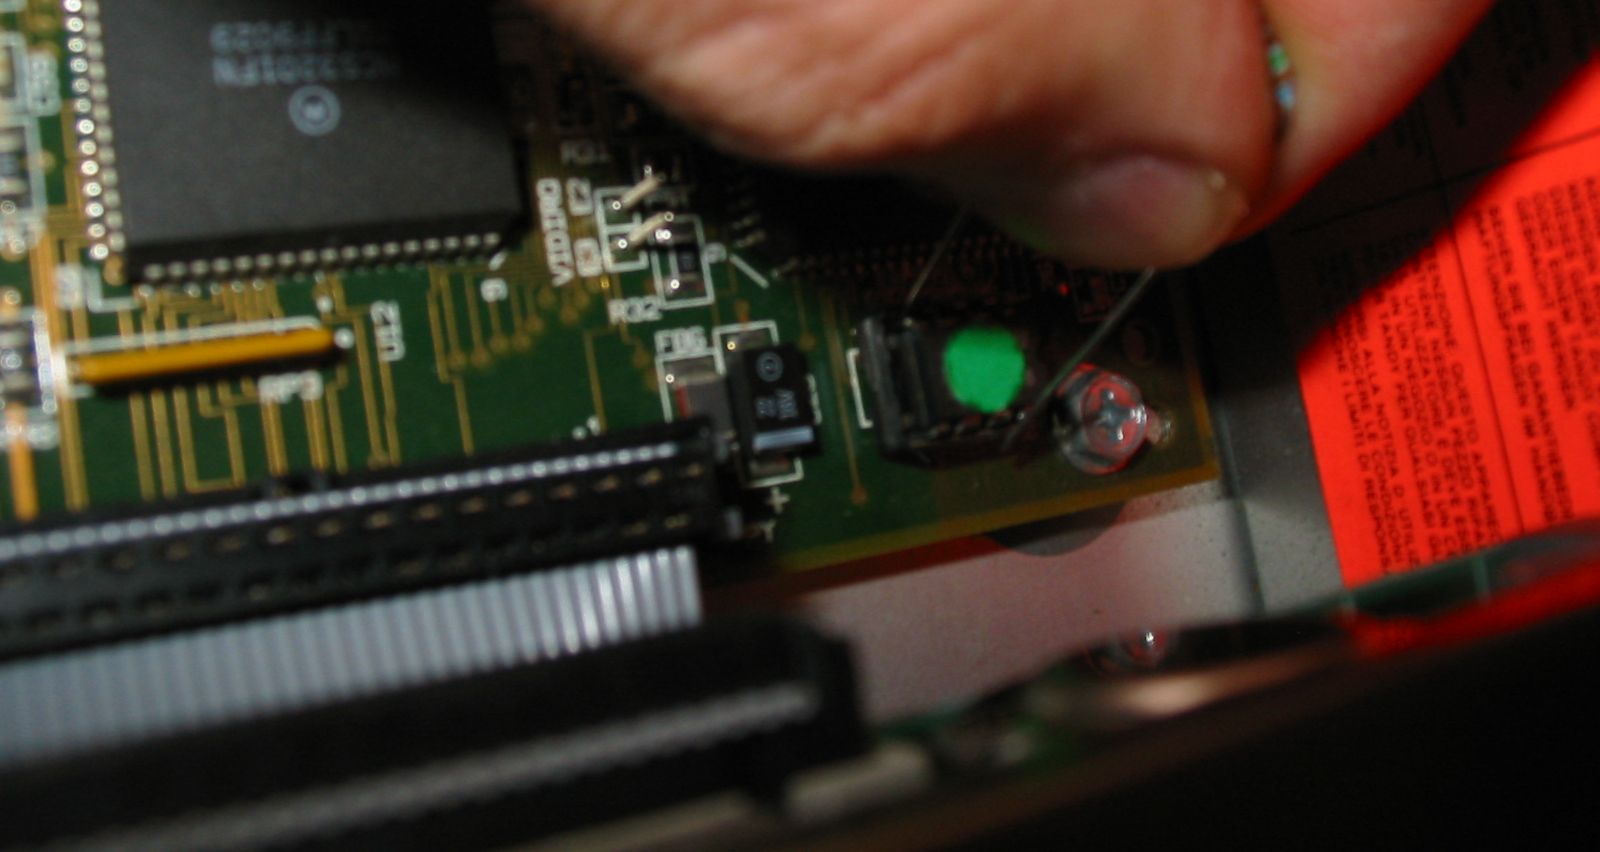
To bypass the EEPROM and boot, you have to bridge pins
4 and 8 with the resistor, as at left, with a bootable floppy in the
floppy drive. After the machine boots, you can discard the resistor and run
SETUPRLX to reset the EEPROM.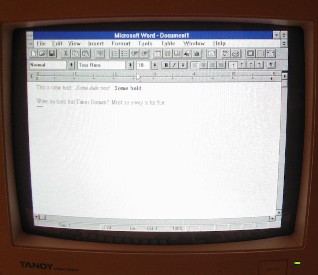
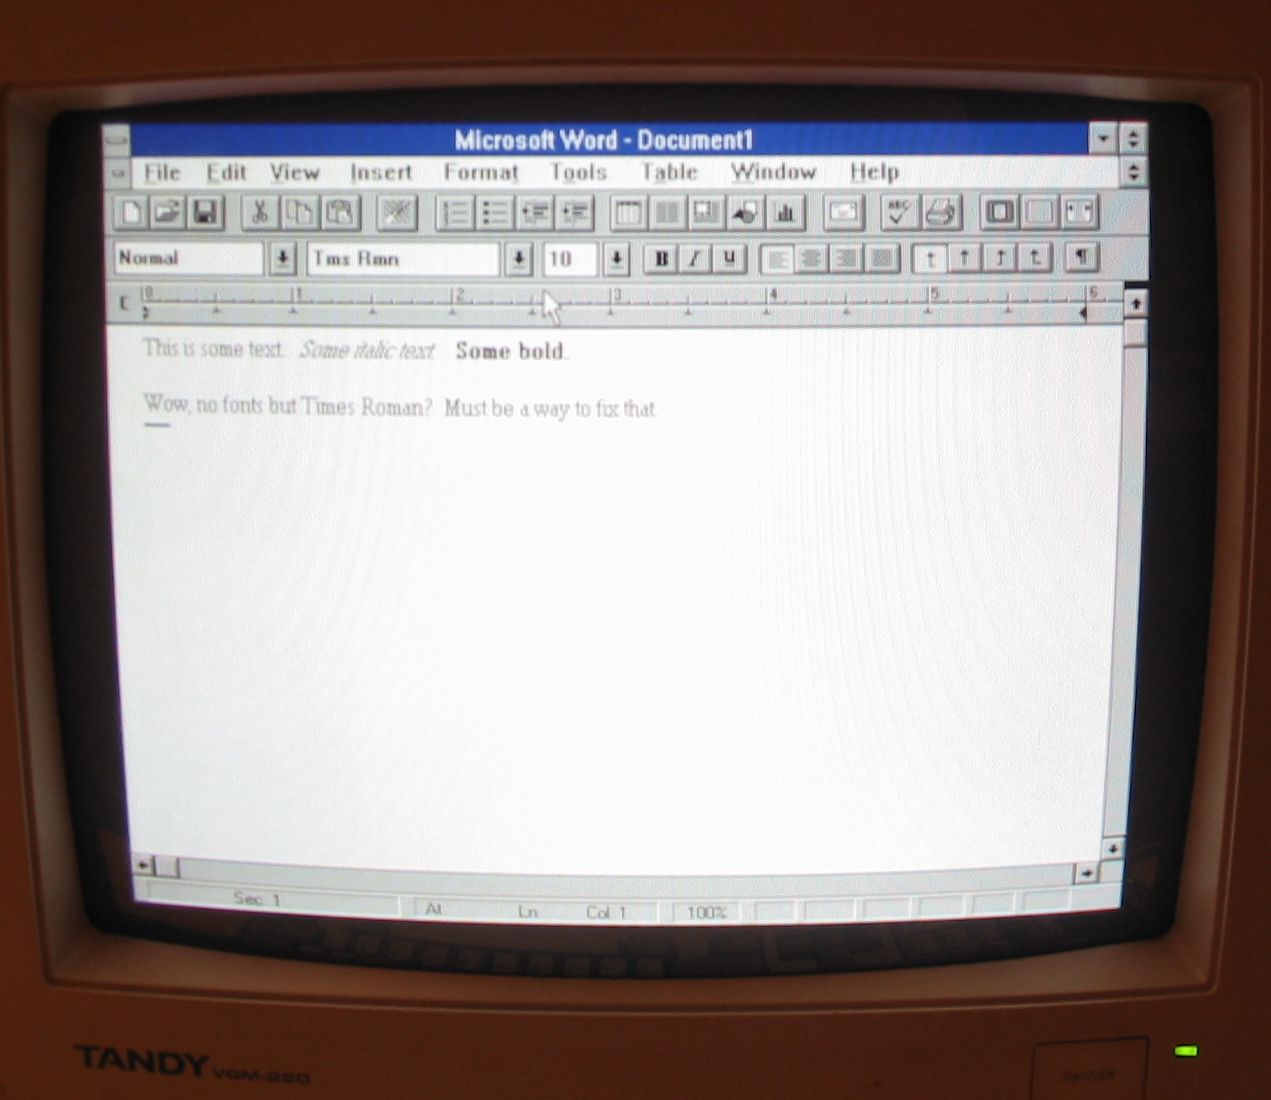
At right is a screen shot of the RLX running
Microsoft Word 2.0 under Windows 3.1. This is the closest I could come to an
actual application that would run under Windows 3.1 with only 1MB RAM. Windows
is very slow in this configuration, but it does work. Unfortunately, the RLX's
built in PS/2 mouse doesn't, so with Windows I used a serial mouse instead.
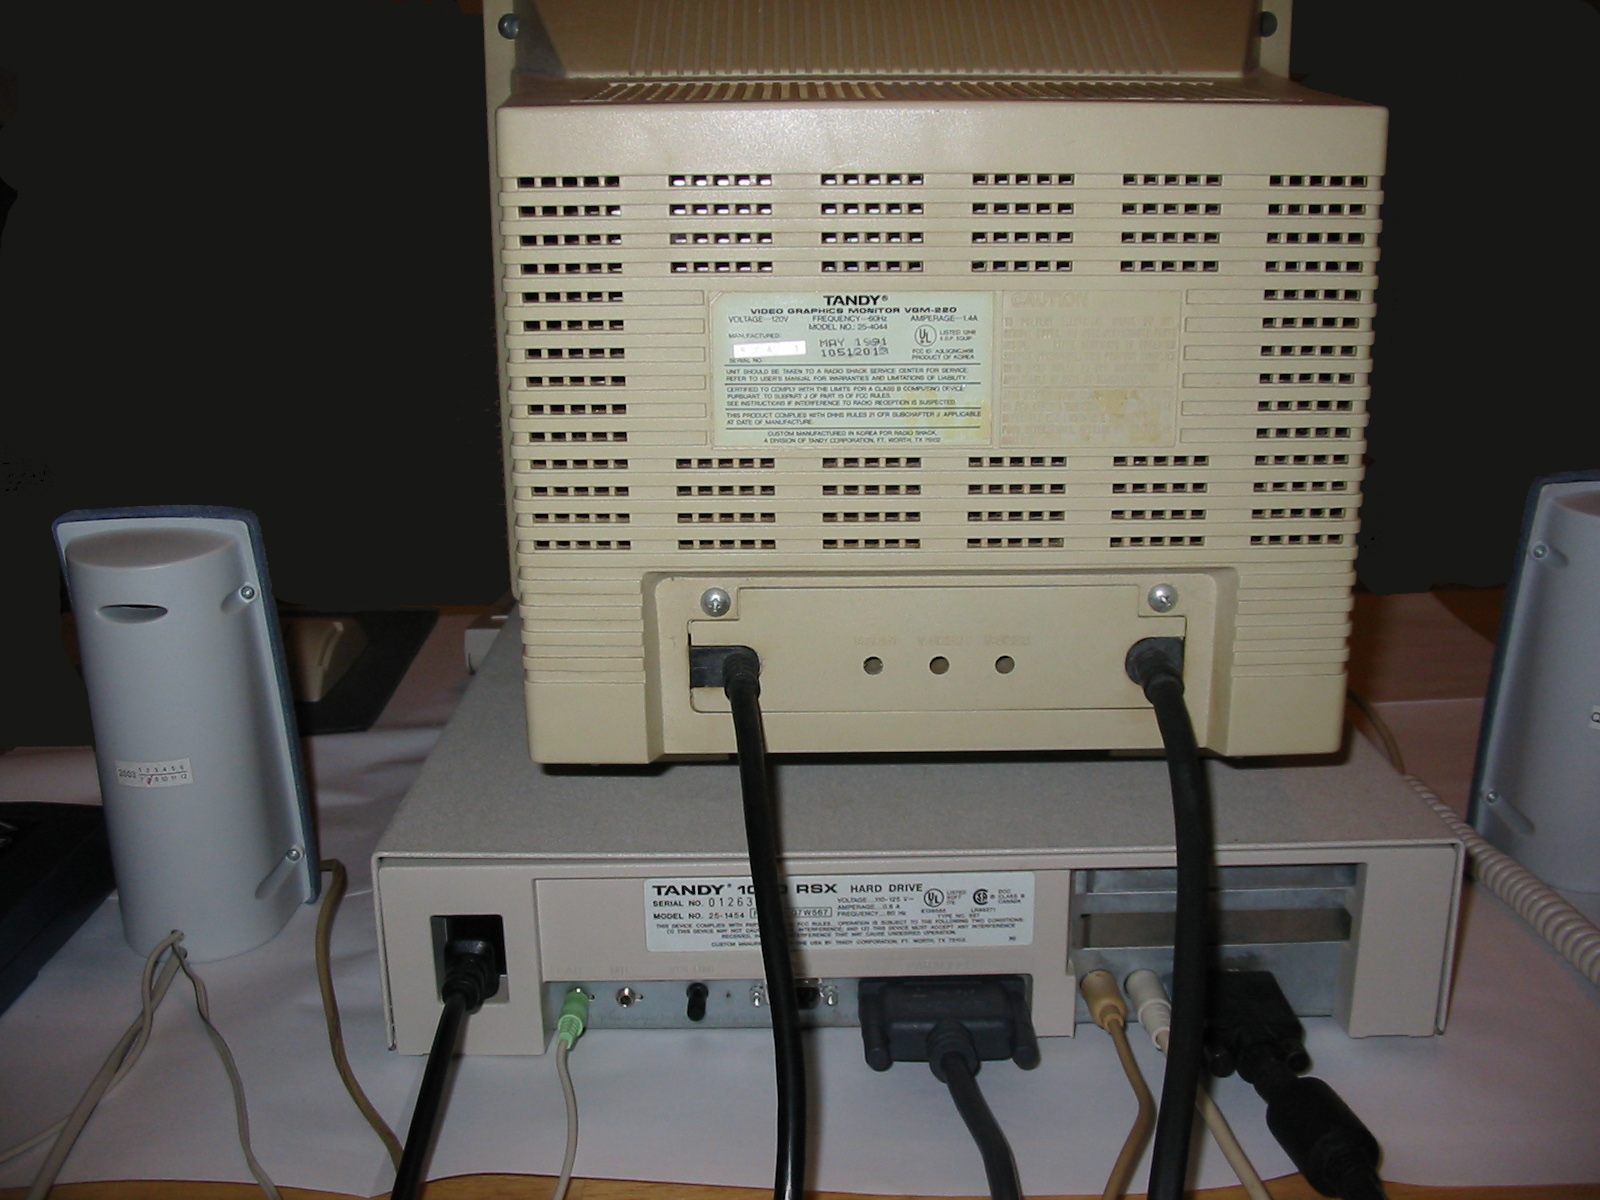
Below, front and rear views of the RSX,
the last of the Tandy 1000 line. At first glance, it looks quite similar to the
the RL and RLX, having the same "slim-line" styling. The RSX, however, has a
25MHz 80386 processor, built-in 256-color SVGA, and supports up to 9MB RAM on
the motherboard, making it the first (and only) 1000-series model capable of
running Windows 3.1 in 386 enhanced mode.
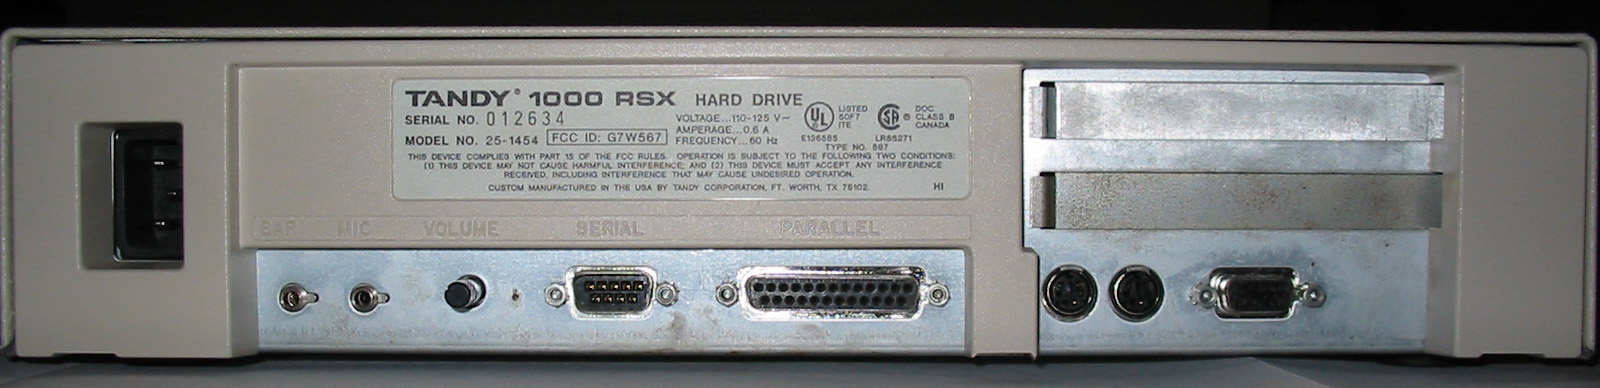
 At
right, front and rear views of the RSX system unit. The front is almost
identical to the RL and RLX. On the rear, however, that the 2-level port
arrangement is changed. From left to right, the ports are an earphone (speaker)
jack, a microphone jack, volume control knob, serial port, parallel port, PS/2
mouse port, PS/2 keyboard port, and VGA monitor connector. At
right, front and rear views of the RSX system unit. The front is almost
identical to the RL and RLX. On the rear, however, that the 2-level port
arrangement is changed. From left to right, the ports are an earphone (speaker)
jack, a microphone jack, volume control knob, serial port, parallel port, PS/2
mouse port, PS/2 keyboard port, and VGA monitor connector.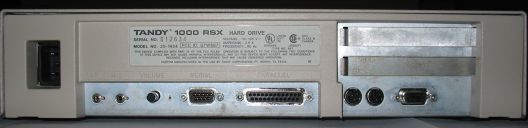
The parallel port is bidirectional. The PS/2 mouse port
is standard and uses standard drivers. The keyboard port takes a standard
AT-type PS/2 keyboard. And VGA has replaced Tandy video. Bit by bit over the
years, Tandy has drifted away from the original 1000 and towards the IBM
standard, until with the RSX all that is left of the original 1000 is the
3-voice chip (now expanded to include the Tandy DAC as well).
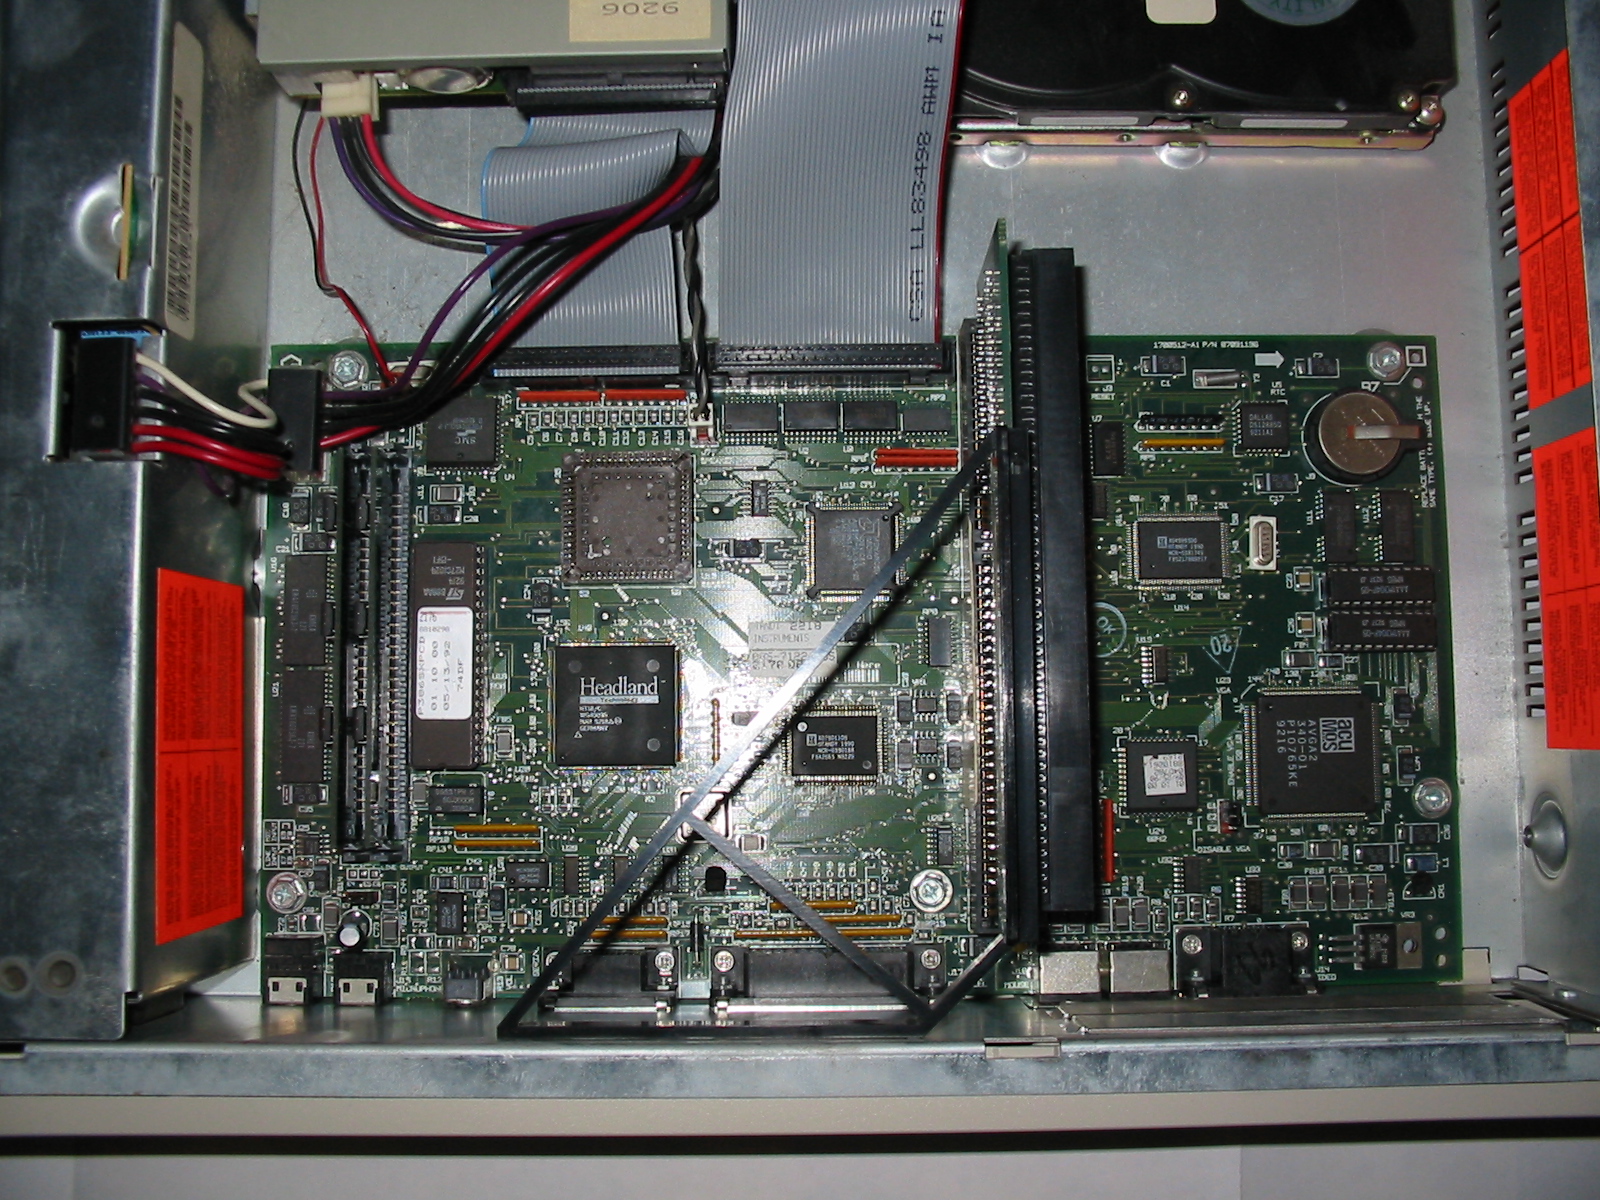
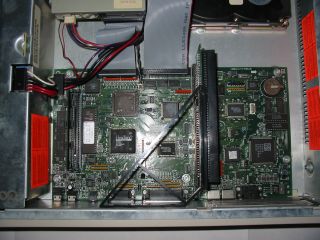
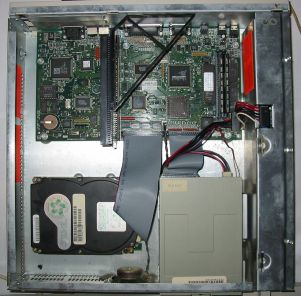 A view of the RSX with cover off appears at
left. The
power supply and floppy drive are in the same place, but everything else is
moved. The speaker has moved from the bottom of the machine to the front,
eliminating the second drive bay. With no drive bay available, the hard drive is
simply screwed to the bottom of the case. The hard drive in the RSX is a
standard AT IDE type. The RSX BIOS supports a user-defined drive type, so any
IDE drive up to 504MB should work; this particular drive is a 60MB model. A view of the RSX with cover off appears at
left. The
power supply and floppy drive are in the same place, but everything else is
moved. The speaker has moved from the bottom of the machine to the front,
eliminating the second drive bay. With no drive bay available, the hard drive is
simply screwed to the bottom of the case. The hard drive in the RSX is a
standard AT IDE type. The RSX BIOS supports a user-defined drive type, so any
IDE drive up to 504MB should work; this particular drive is a 60MB model.
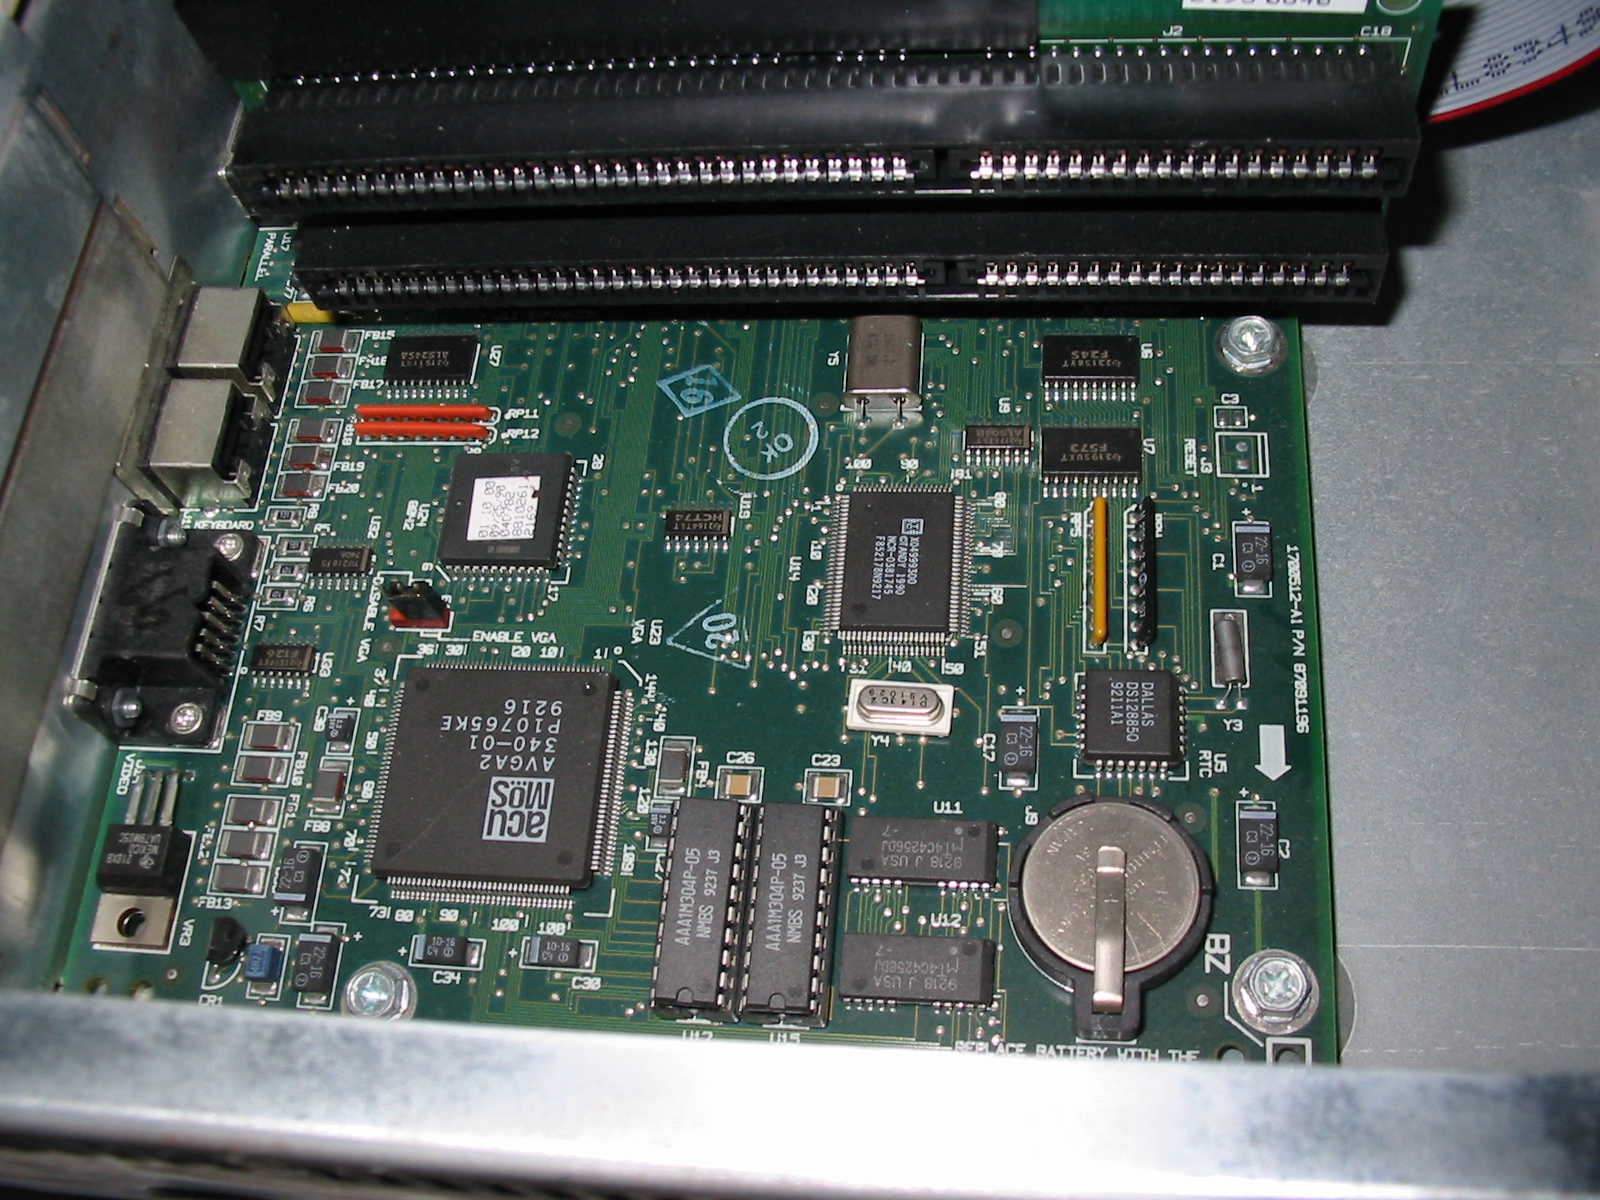
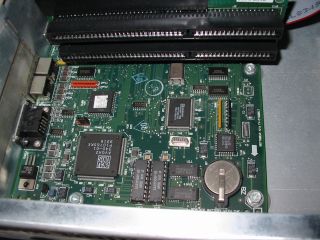
At right, a look at the RSX motherboard. The 386 is the large square
chip at center left in the picture; above it is the 387 socket (I don't have a
387). The VGA chipset is at the rightward end of the board. At the left end are
the two 30-pin SIMM sockets. The motherboard measures only 11" by 6".
The RSX is the only 1000-series model with 16-bit expansion slots, as shown at
left. Oddly, the slots are not actually on the motherboard but on a
riser card - the RSX has only one real 16-bit slot on the motherboard. Riser
cards with more than two slots have been made, so one could perhaps replace this
riser with a larger one and run the RSX with the cover off to get more slots.
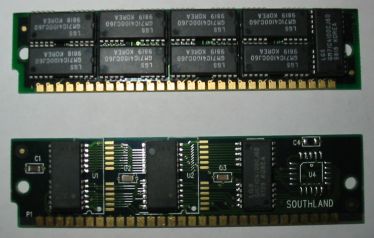
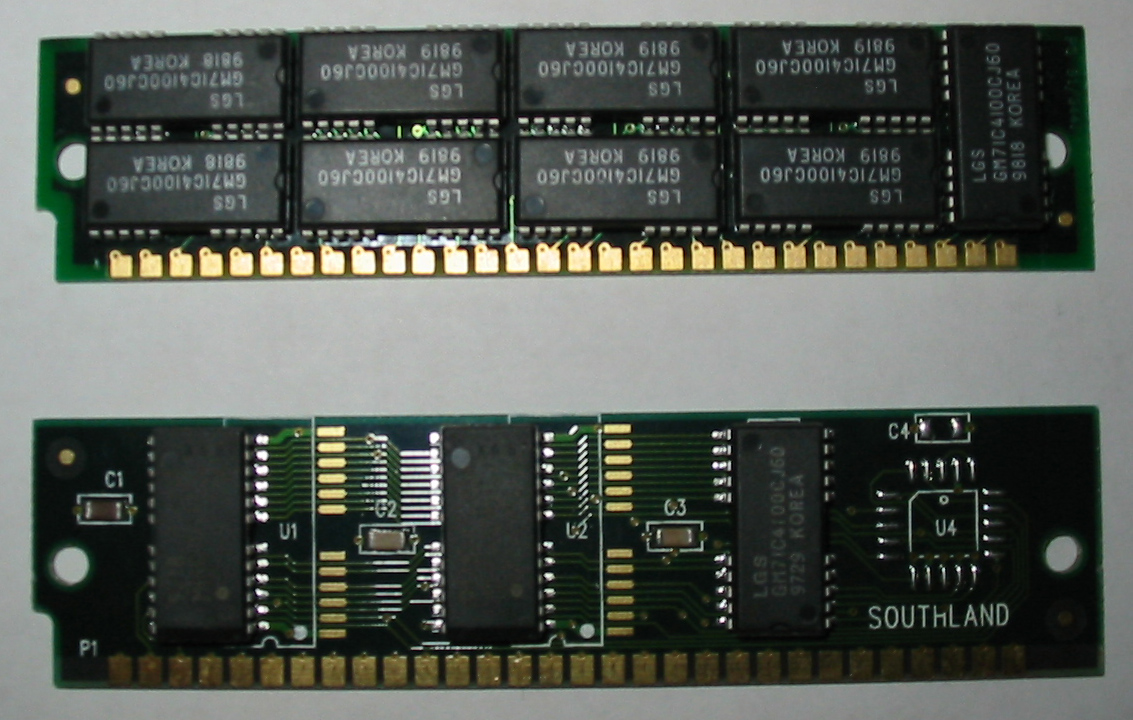
The RSX takes either 2 70ns 1Mx9 SIMMs, or 2 60ns 4Mx9 SIMMs. 70ns 4MB SIMMs
won't work, and not all 30-pin 60ns 4MB SIMMs will work. In the picture at
right, the 9-chip SIMM on top will work in the RSX, while the 3-chip SIMM
on the bottom will not. You have to install a matching pair of SIMMs to upgrade
the memory. With the SIMM sockets empty, there is 1MB RAM on the motherboard.
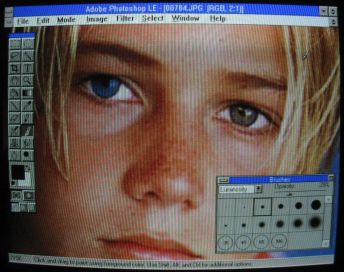
At right: changing eye color with Photoshop
2.5. With built-in 256-color SVGA,
Windows support
for the Tandy sound chip, and the memory upgraded to 9MB, the RSX can run most
software for Windows 3.1. The built-in video supports resolutions up to 800x600
in 256 colors, or 1024x768 in 16, with an appropriate monitor. The RSX still
doesn't meet the Multimedia PC standard, however, since it doesn't have a CD-ROM
drive, nor a drive bay to install one. External CD-ROM's exist that can attach
to the parallel port, or to a SCSI card in an expansion slot.
Go back to Tvdog's Home Page.
|